beauty

Tempted to try microneedling at home? Here's how to do it (without wrecking your face).

Update: May 13, 2020.

The longer isolation goes on, the more we’re convinced we can tackle all sorts of beauty treatments at home. (Whether we actually can is a different story.)

Like removing our own SNS and shellac manicures, dyeing our hair pink or using a box dye, touching up our roots, cutting our fringes, doing our eyebrows, tinting our lashes… even at-home brow lamination. The list goes on.

While at-home beauty treatments can’t replace the skill and expertise of a professional (anyone else really keen for beauty services to hopefully re-open soon?), they can give you something fun to do for yourself if you’re looking to do a bit of self care. Or, if you’re just really, really bored.

WATCH: Here’s how to improve your skin while you sleep, post continues after video.

Video by Mamamia

So, we thought now would be the perfect time to resurface this comprehensive road test and explainer on microneedling at home from Mamamia’s Executive Editor and You Beauty podcast host Leigh Campbell.

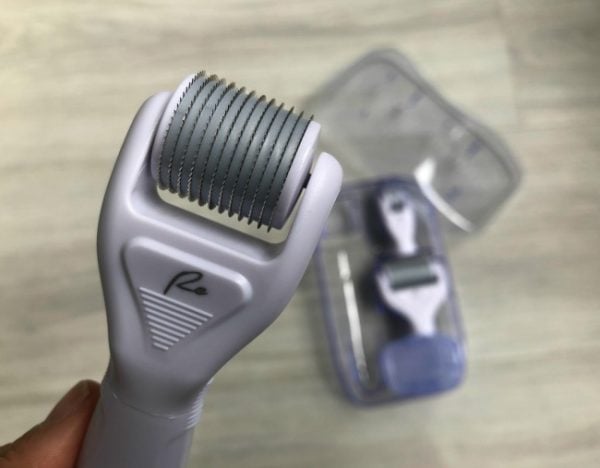
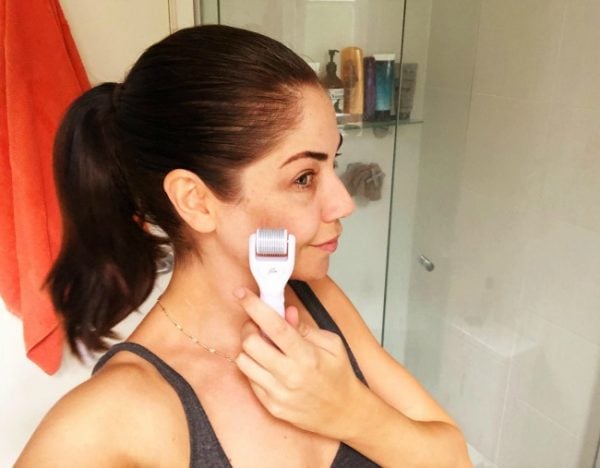
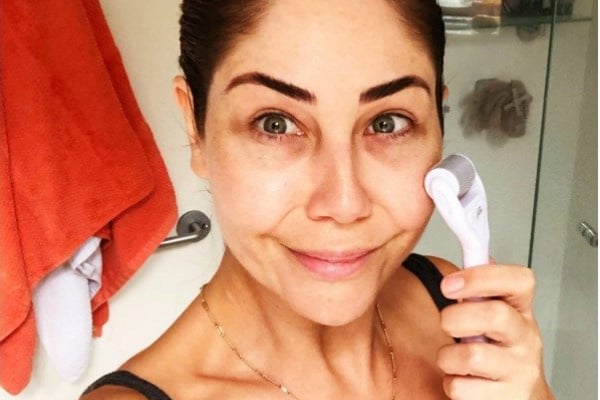
Below, Leigh answers all your microneedling (also known as dermarolling) questions, from what the skin treatment can do for your skin and how to use an at-home dermaroller safely.

ADVERTISEMENT

***

When I told my husband I was going into the bathroom to make tiny holes all over my face with lots of needles he didn’t even look up. Such is the reality of being in a relationship with someone who is addicted to beauty treatments.

Anyway, onto the needles. It’s called dermarolling and it isn’t a brand new thing.

In-salon treatments such as Dermastamp have been available for about a decade and involve a qualified person (like a nurse or doctor) and the use of a machine to make tiny holes in your face with micro needles. Now you can do this at home.

But why? Good question.

LISTEN: Listen to Mamamia’s Kelly McCarren on her experience with skin needling on the You Beauty podcast below. Post continues after audio.

What is Dermarolling?

Dermarolling (also known as microneedling) not surprisingly involves the use of micro-needles to create teeny tiny microscopic holes in the skin.

Essentially, by creating superficial trauma to the skin it is kick-started to repair the damage by way of stimulating collagen production.

Collagen is a protein found throughout the body which is responsible for lots of things, but in the skin is what makes it feel soft and subtle.

ADVERTISEMENT

The result of microneedling is a reduction in lines, scarring, pigmentation and an improvement in both visible and physical tone and texture.

Sounds great, right? That’s why I gave it a go.

How to do microneedling at home.

First up, you need to buy yourself a dermaroller.

I used the Re Facial and Body Roller, $49.99, because I liked that it had a different attachment to use on a few scars and marks on my body, too, as well as a smaller head for around the eye area.

Other popular at-home microneedling tools include the Lonvitalite Dermal Roller, $59.95, and the Press Beauty The Activator 0.3MM Rose Gold Dermal Roller, $59.95. When picking your needle size, always stick with smaller .3 or .5 sizes – leave the bigger needles for the professionals.

This is what the tool looks like. Image: supplied.
ADVERTISEMENT

I did some Googling as to the consensus about the best way to do it. I was put off by the warnings of risk of infection but once I read enough I felt confident with trying it. Here's my process:

  • I made sure my dermaroller was fully functional and not faulty by inspecting it closely to look for bent needles and by making sure it rolled easily on the back of my hand.
  • I cleansed my skin thoroughly, removing all makeup and oil so I was left with a totally bare face.
  • Using what I would probably call a medium pressure, I started on my forehead and pushed the roller back and forth a couple of times in different directions, working across and back and then up and down. I read that dragging the roller could lead to scratches so instead make sure I was pushing down slightly and rolling.
  • Next I moved onto the temples, sides of my face and jawline. I used my free hand to pull the areas tight so that there was no drag on the skin.
  • Lastly I very lightly rolled over my cheeks, as that was the area which felt most sensitive to the sensation.
I look calm here but I was actually really hesitant. Image: supplied.
ADVERTISEMENT

After I’d finished rolling, which only took maybe three or four minutes total, I immediately applied a hydrating serum because one of the effects of micro-needling is that the absorption of topical products is amplified.

It’s safe to use hydrating products right afterwards but steer clear of any acids or chemical exfoliants.

Does microneedling hurt?

I’m not going to say it’s totally pain free because that would be a lie. It stings a bit and is mildly uncomfortable but because you're in control of the pressure, you also control the pain.

Pushing too hard could possibly cause damage, anyway, so start cautiously until you find the sweet spot.

It’s important to sanitise your dermaroller weekly by sterilising it in alcohol, rinsing it in warm water and leaving it to air dry. Also ensure you store it with its plastic cap on so no damage occurs to the needles.

My microneedling and dermarolling results.

The next morning I put on my face cream and was really happy with how plump and glowy my skin looked. Image: supplied.
ADVERTISEMENT

The next morning when I woke up my skin was definitely more plump and it looked slightly more ‘fresh’.

My day cream went on like a dream and overall I looked more dewy. I’m pretty stoked with the results and plan on incorporating dermarolling into my weekly at-home facial routine. Which happens on Thursday, in case you were wondering.

This post was originally published in March, 2018, and has since been updated. Feature image: Leigh Campbell.

Have you tried dermarolling? How'd it go? Tell us in the comments below.