food

'A video of my Woolies mud cake hack went viral. Here's how I did it for well under $50 dollars.'

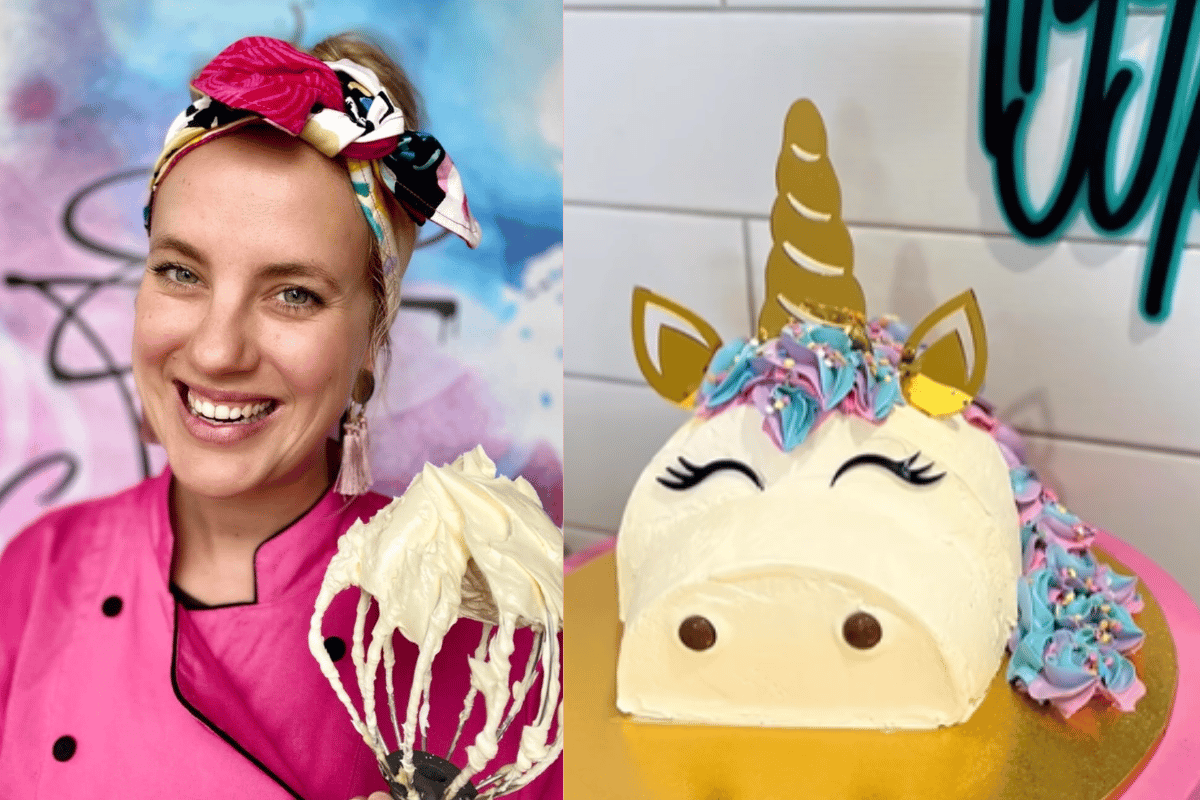
My name is Tigga Mac, and I'm a Melbourne based cake designer and content creator, who co-owns a cake business in Melbourne with my best mate Kate. 

Cake decorating is an incredibly time-consuming art form and there is a huge amount of work in creating a custom-themed party cake. Cake decorators deserve every cent they earn! I did however realise that not every parent can afford to pay a cake decorator – plus, the mental load around kids' parties on mums is especially stressful.

Throughout the COVID period, I started a TikTok account showcasing my cake skills and combining them with voiceovers. Many of these videos went viral and since then collectively our social channels have amassed a following of over two million!

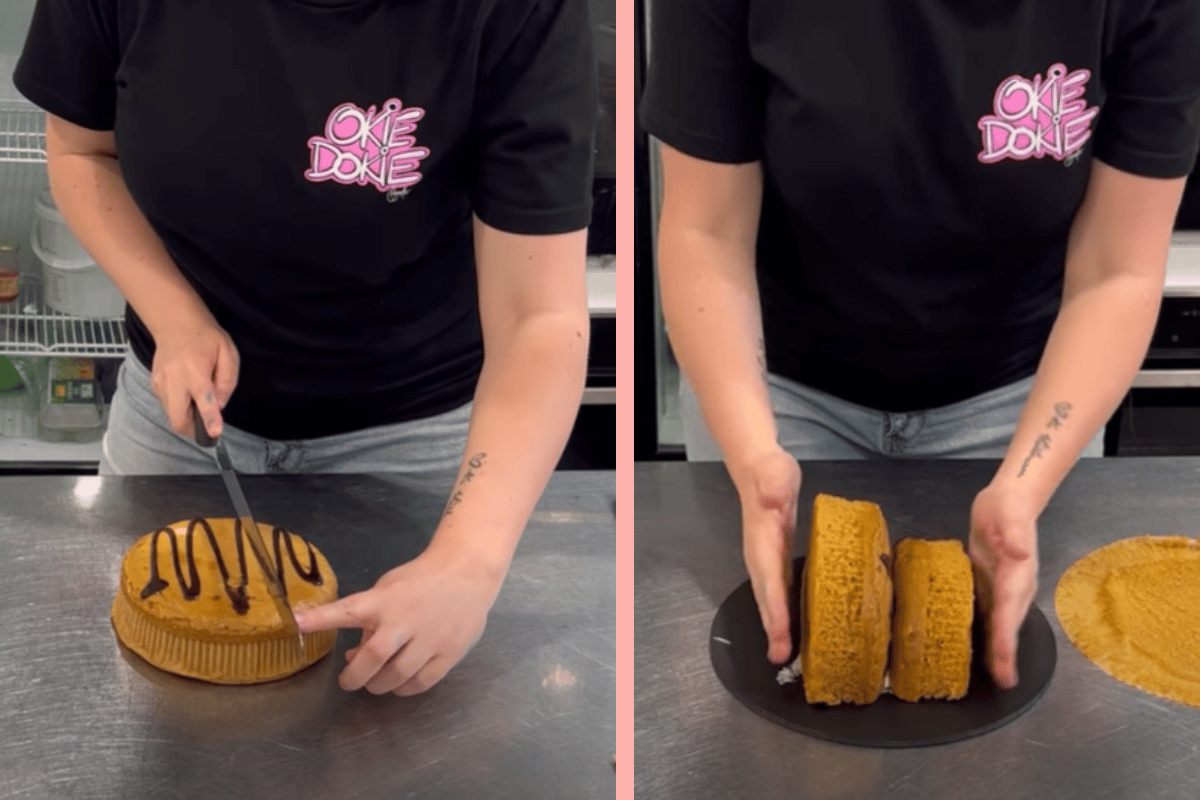
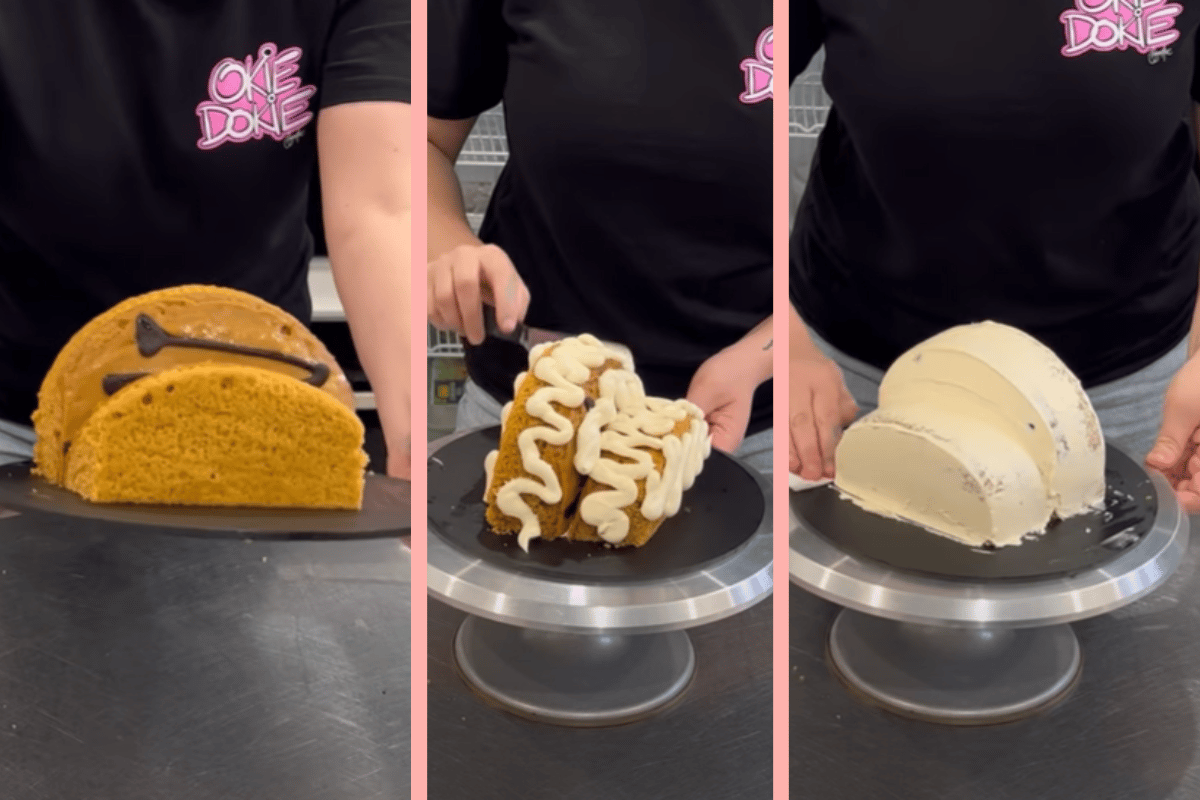
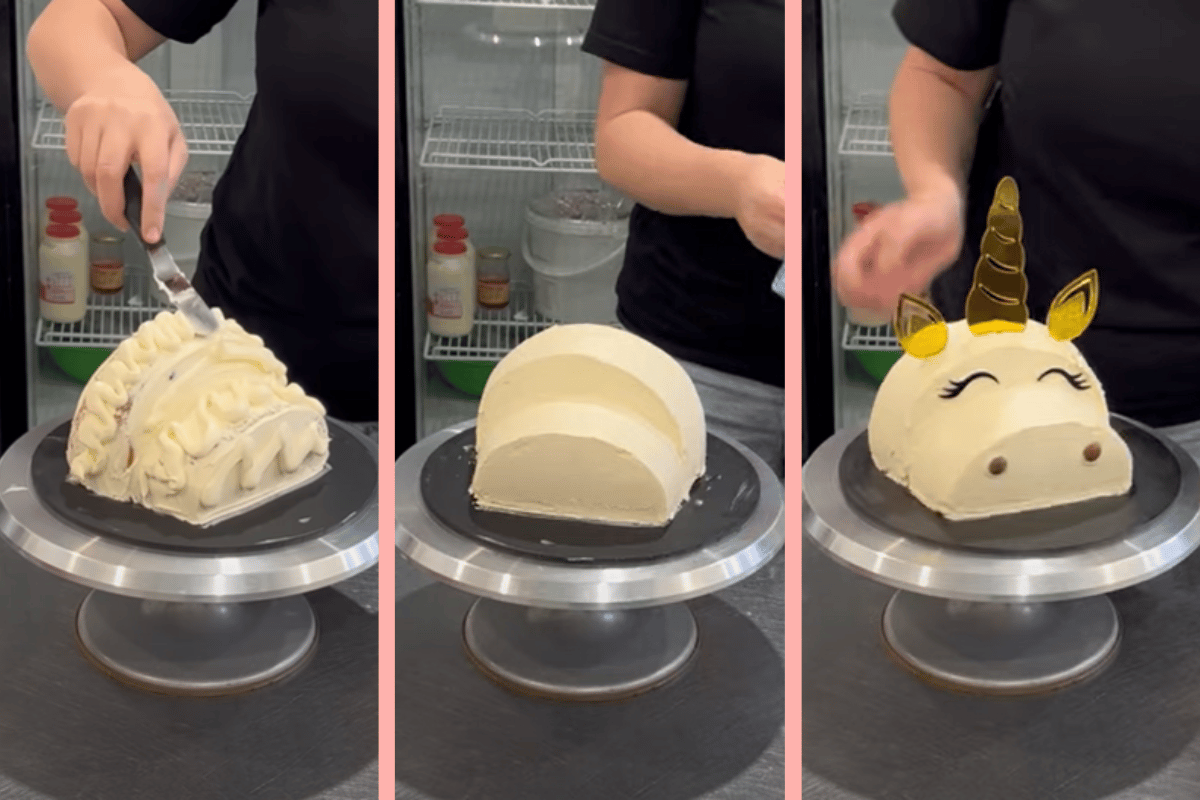
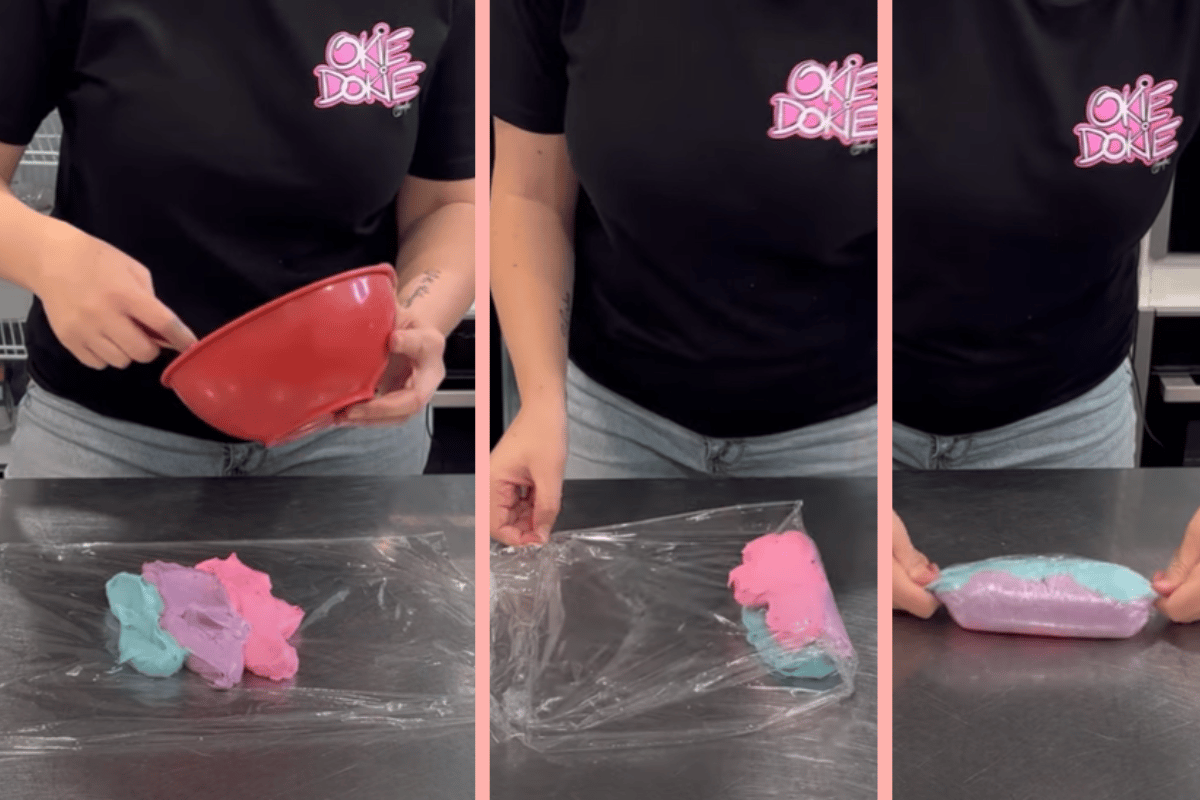
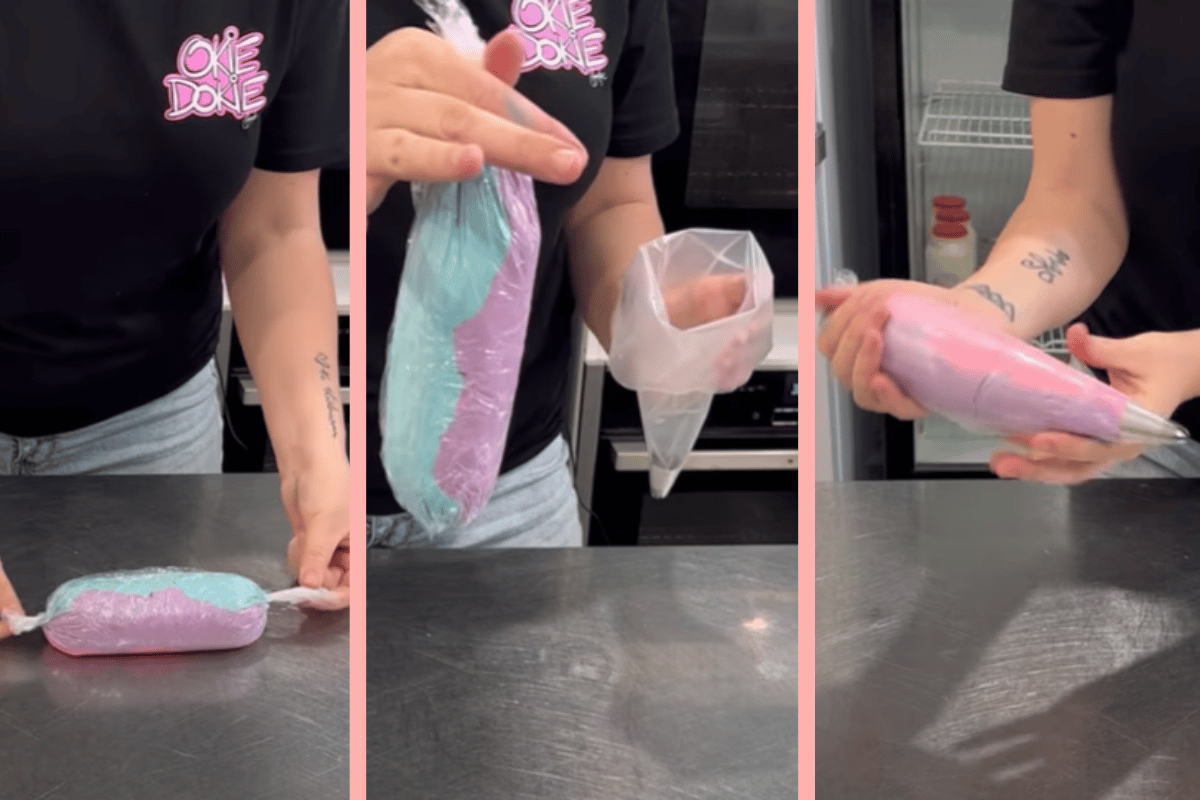
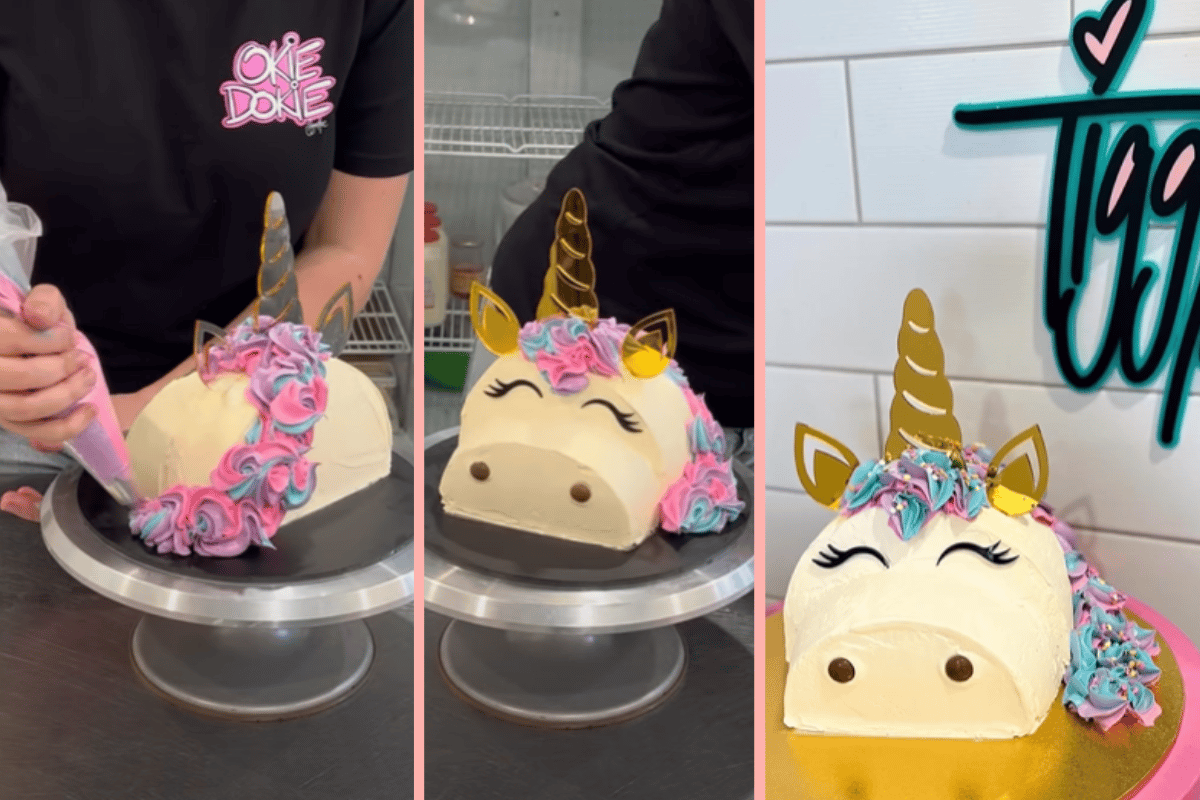
So I began creating these cake hacks, and they went absolutely viral – including one where I turned a Woolies mud cake into a unicorn. 

Watch: The sparkliest party trend, aka, unicorn parties. Story continues below.


Video via Mamamia.

All the hacks use supermarket ingredients making them budget friendly and are basic enough for anyone to create – I promise. 

First and foremost, here's what you need to make a very cute unicorn mud cake. 

ADVERTISEMENT

The Ingredients.

  • A store-bought mud cake from Coles and Woolies. Any flavour of your choice, the main supermarkets often have chocolate, caramel or white chocolate cakes available.
  • Some piping bags and a piping tip nozzle, which you can easily purchase from Spotlight, Woolies or online. For the nozzle, I used the size '2d'.
  • A small bag of Smarties (you will only need two brown ones for the nostrils, so the rest of the bag you can keep and enjoy for yourself later!).
  • A handful of sprinkles (this is optional, it just looks extra nice).
  • A knife to cut your store-bought cake, and a palette knife to smooth over the icing. 
  • Three food colouring options, which again are available from Spotlight, Woolies or online. I used pink, purple and blue.
  • A unicorn topper kit. I purchased mine from Coles for $5, and it includes the ears, the horn and the eyes. Plus, it's reusable for future cakes. 
  • Icing of some sort. I use my own recipe for buttercream, but you can also buy two tubs of store-bought buttercream icing of your choice – just make sure it is soft.
  • A cardboard cake board.
  • Last but not least, some glad wrap.

The Method.

Step 1. First thing you want to do is take your mud cake out of the packaging and cut it – you want the cut to be off-centre, as shown in the picture. The bigger side will be the face/head, and the smaller side will be the nose. I would recommend cutting your cake after it's been in the fridge for a few hours so that it's a clean cut.

Step 2. Put a small smear of icing on your cake board. This is going to act as a 'glue' of sorts for your cake to sit comfortably on and stay in place. Stand the bigger slice first on the board, and then place the smaller slice next to it as shown in the photo, and squash them together. This will form the shape of the unicorn!

Image: Supplied.

ADVERTISEMENT

Step 3. Next step is to shave off the sides a bit, in order to make it look more like a unicorn head. 

Step 4. Now we're up to icing! For the first 'crumb layer' of icing, I like to use a piping bag, adding some of the soft buttercream into the bag and roughly piping little squiggles along the cake, using a palette knife to smooth them over. 

This is called a crumb layer because it's used to catch any crumbs and get a nice smooth surface for your top icing coat to then go on. Once this first coat is applied, pop it in the freezer for five minutes. This is to make it easier when we apply the next layer and decorations – less mess, less stress!

Image: Supplied.

ADVERTISEMENT

Step 5. After those five minutes in the freezer, it's time to apply your second layer of icing, using the same method as the first layer, smoothing it over as best as you can. I then use a fresh, clean, damp cloth to wipe the excess icing left on the edges of the cake board to make it nice and clean. 

Step 6. Next, pop your cake toppers (unicorn horn, eyes and ears) into the cake as shown in the below image. For the nose, pick out two brown Smarties and pop them on the smaller slice of the cake, aka the nose area, as shown in the image below.

Step 7. Now we're up to the unicorn's mane. Get two small bowls, pop some buttercream icing in each, and add a few drops of different food colouring to each bowl. The more drops you use, the brighter the colour will be - it is completely up to you how vibrant you would like it. For me, I put some pink food colouring in one bowl, and some blue in another and mixed each bowl thoroughly. The purple food colouring icing will come soon!

Image: Supplied.

ADVERTISEMENT

Step 8. Once you have your two separate bowls of coloured buttercream icing ready, you want to put a large sheet of glad wrap across your kitchen bench. Spoon the pink icing into a line in the middle of the glad wrap. 

In that bowl used for the pink icing – don't bother cleaning it out immediately. Rather, just use that one to make your purple icing this time. Once mixed, then again add in a line of the purple icing next to the pink icing on the glad wrap.

And last but not least, finish the same process with the blue icing, and it should look something like this:

ADVERTISEMENT

Image: Supplied.

Step 9. Fold the glad wrap in half, roll it like a sausage and wrap up the edges and twist. You will be left with one twist on each side. Cut one of those sides off with some scissors. Get your piping bag ready and place the piping tip inside the piping bag, cutting off the tip of the bag so that the icing will be able to push through. 

Next, you place your icing glad wrap sausage inside the piping bag, cut tip facing down. So when you pipe, it will look like a rainbow swirl. For inspiration on how to pipe the mane, I would recommend following the pictures and tutorial video (down below) as a guide. 

ADVERTISEMENT

Step 10. The final step is to add some sprinkles to the unicorn's mane. This is optional, but it looks super nice!

Image: Supplied.

Image: Supplied.

ADVERTISEMENT

And that's it. We reached the end! All in all, this takes about 20 to 30 minutes to create. 

As for the cost, it's super budget friendly as well, considering how expensive it can be to get fancy kid's birthday cakes ordered, when that's not something all families can afford. This entire unicorn cake costs approximately $30 to make – definitely under $50!

I feel incredibly blessed to have a job that I love and be able to be a lady start-up business with my best mate. 

Every child deserves to have a cake on their birthday and it's been an absolute joy to be able to provide a simple guide for anyone to follow to bring these creations to life. 

ADVERTISEMENT

Happy baking!

For a more in-depth video tutorial of this unicorn cake, you can check out Tigga Mac's YouTube tutorial hereYou can also follow Tigga Mac on Instagram, and her website for more information here

Feature Image: Instagram @cakefordays.

Love watching TV and movies? Take our survey now to go in the running to win a $100 gift voucher.