food

The only 5 recipes you need in your baking repertoire, according to a time-poor chef.

I studied cuisine at Le Cordon Bleu and prepared one pastry a day for nine months, yet I’ve never felt I’ve fully mastered the art of baking

Savoury, on the other hand, I can do any day of the week; it’s versatile, dynamic and, best of all, easy to fix when something goes wrong. 

I’m always in awe of pastry chefs and naturals like my mum, who can throw together a perfect dessert without a qualm.

Watch the trailer for Mamamia's food podcast, What I Eat When. Post continues below. 


Video via Mamamia.

Since becoming a chef 11 years ago, I’ve worked in the pastry section of restaurants, shared many home cooked pastries with friends and family, run my own farmer’s market stall selling buttercream frosted cupcakes, and sat at the kitchen table for countless hours deliberating recipes with my grandma. 

In this time, I’ve had many baking wins, but also plenty of losses. The fails are frustrating and I’m now at a point in my life where I’m cooking and writing recipes that work for me every time; they’re my favourite, and they’re foolproof. 

I have a seven-month-old baby (not sleeping), a business to run, way too much washing to do, and I can’t afford the time or disappointment of another baking mishap... I bet you’d prefer to avoid one too. 

ADVERTISEMENT

So, these are my top five most delicious and reliable sweet recipes, the ones I turn to and the ones my friends and family request again and again.

Spelt, Oat & White Chocolate Cookies.

If you have an oven, local grocery store and electric mixer, you gotta try these cookies! Spelt, oats and white chocolate (the latter caramelises in the oven).

ADVERTISEMENT

Perfectly nutty, with a hint of salty, they’re my perfect biscuit. I can’t stress that enough! Perfect. Keep half the mix in the freezer and bake whenever you may need some fresh cookies in your life.

Ingredients

- 250g salted butter, softened (or 250g unsalted butter + ½ tsp kosher salt)

- 100g caster sugar

- 50g light brown sugar

- 1 tsp vanilla extract

- 120g plain flour

- 120g spelt or rye flour 

- 110g rolled oats

- 120g roughly chopped white chocolate

Method

1. In a stand mixer with the paddle attachment (or using an electric hand beater), cream butter, sugars and vanilla extract until very pale and fluffy.

2. Add flours and beat on low until just combined.

3. Add rolled oats and white chocolate and beat on low until just combined.

4. Remove bowl and fold through any remaining dry bits using a large spatula.

5. Cut two large pieces of gladwrap (or baking paper).

6. Divide dough in half and place each half on individual gladwrap pieces.

7. With your hands, gently shape dough into a log, wash your hands, then fold over plastic.

8. Use your hands to roll out the dough inside the plastic wrap until it becomes a cylinder log. Press in the top and bottom to flatten the ends.

ADVERTISEMENT

9. Freeze or refrigerate for at least 45 minutes, until firm.

10. Using a sharp knife, slice logs into 1cm pieces and place on a lined baking tray, 3cm apart. If the rounds fall apart while slicing, just gently press the pieces back together - they will come out fine.

11. To bake, preheat oven to 150°c.

12. Bake for 10-15 minutes (mine typically take 13), until golden brown around the edges.

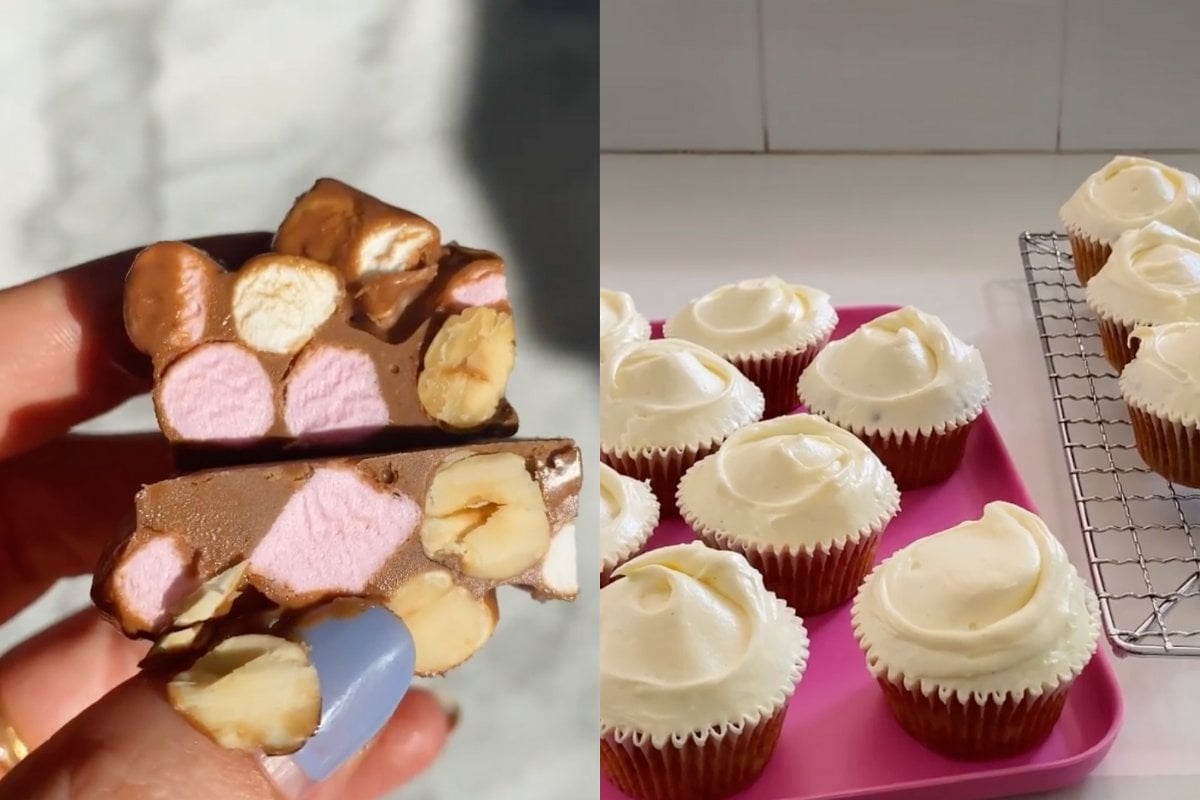
Hazelnut Rocky Road.

ADVERTISEMENT

I make blocks of this rocky road, wrapped in cellophane or kraft paper, for my family at Christmas, Easter and birthdays, and it’s a real favourite. 

The words 'best chocolate ever' are usually hanging in the air whenever it appears. 

It has secret recipe vibes because my family can’t believe how good it is. The hazelnuts elevate it above your average peanut rocky road, the sea salt makes it addictive, and the marshmallows make it fun. It’s so quick to throw together and it’s my absolute easiest sweet recipe.

Ingredients

- 300g hazelnuts, roasted and skins removed (you can roast skinless to make this easier)

- 500g melting chocolate (preferably Callebaut Gianduja, alternatively Cadbury Melts work well)

- 100g mini or marshmallows

- Sea salt

Method

1. Melt chocolate in a bowl over a pot of simmering water (make sure the boiling water isn’t touching the bottom of the bowl, it should be heated from the steam, not water).

2. Allow the chocolate to cool slightly (otherwise it will melt the marshmallows). Stir through marshmallows, roasted hazelnuts, and a pinch of sea salt.

3. Pour onto a tray lined with baking paper, allow to cool for at least 1 hour in the fridge, then chop into blocks in whichever size you prefer. If you’re using the Callebaut Gianduja, note that it’s quite soft at room temperature, so is best kept refrigerated.

ADVERTISEMENT

Banana Cupcakes.

I’m a cupcake girl and I always will be. 

No exaggeration - these cupcakes are not only the best cupcakes, but also the easiest cupcakes I’ve ever made. 

The mix comes together in two very quick steps, and I have a hack to always have bananas on hand. 

My banana hack is buying around 12 bananas, letting them blacken and ripen, mash them all, and portion them out. 

ADVERTISEMENT

This will make enough for 3 batches of cupcakes, so I bake one batch, then freeze the portioned mashed bananas to defrost whenever I fancy making more (usually not long after).

Ingredients - Cupcakes

- 165g caster sugar

- 240g SR flour

- ½ tsp bicarb soda

- ½ cup chopped walnuts

- ½ tsp salt

- 125g melted unsalted butter, cooled

- 1 tsp vanilla bean paste

- 2 eggs

- 1⅔ cups mashed overripe banana (about 4 bananas)

- 2 tbsp milk

Ingredients - Cream Cheese Buttercream

- 50g unsalted butter, room temperature

- 250g cream cheese, room temperature

- ½ tsp vanilla bean paste

- 300g icing sugar - beat until light and combined

Method - Cupcakes

1. Preheat oven to 160°c fan-forced.

2. In a mixing bowl, whisk together dry ingredients.

3. In another bowl, combine wet ingredients.

4. On low speed, or with a spatula, gently combine wet and dry ingredients.

5. Pour into patty pans and bake for ~18-20 minutes (until they bounce back slightly when touched).

ADVERTISEMENT

Method - Cream Cheese Buttercream

1. Using a stand mixer or electric beater, beat butter until it lightens in colour (~2 mins on high).

2. Add cream cheese and vanilla extract and beat until smooth.

3. Add icing sugar on low speed to combine, then turn up to high and beat until light and smooth.

Tiramisu.

I’ve tried so many tiramisu recipes over the years and have tweaked my recipe to the point where I don’t think it can get better (unless I were to make my own ladyfinger biscuits, which I have done, but that would not be respectful to my or your free time). 

ADVERTISEMENT

Tiramisu is one of those desserts which looks intimidating, but really shouldn’t. 

My tiramisu contains egg yolks, for a richer mascarpone cream, and Sicilian marsala in both the cream and biscuit dunk. 

Marsala isn’t something I cook with much but it’s so complementary to the espresso and mascarpone that I want it present in every aspect of this dessert.

Ingredients

- 100ml marsala (Pellegrino if your bottle-o sells it, otherwise Boronia is fine)

- 4 egg yolks

- 130g caster sugar

- 250ml mascarpone

- 250ml thickened cream

- 300ml espresso, cooled

- One packet Savoiardi biscuits (400g)

- Dutch cocoa, to serve

Method

1. Bring a pot of water to a simmer.

2. Make a sabayon by whisking half of marsala (50ml), egg yolks and 30g sugar continuously in a stainless steel/heatproof bowl over the simmering water, making sure the bottom of the bowl isn’t touching the top of the water.

3. By hand or using an electric beater, whisk until the mixture thickens and holds a ribbon (5-8 minutes).

ADVERTISEMENT

4. In a stand mixer with whisk attachment or in a bowl, whisk cream and remaining sugar until medium peaks form.

5. In another large bowl, add mascarpone and whisk by hand until smooth.

6. To mascarpone, gently whisk in sabayon until incorporated, followed by whipped cream.

7. Whisk until soft peaks form.

8. Combine espresso and remaining marsala in a small bowl to dip biscuits.

9. Dip biscuits very briefly in liquid (too long and they will fall apart), then place in rows in a baking dish (around 24cm).

10. Layer with half of the cream mixture, and repeat for the second and final top layer.

11. Cover and place in the fridge to set for around 2 hours (until firm).

12. To serve, dust with a touch of cocoa using a sieve.

Cinnamon Buns

ADVERTISEMENT

These are dangerous! In a good way. 

I’ve had so many heartwarming messages from friends and followers about these, all with the same sentiment; shock and pleasant surprise that they made this impressive dessert with such ease! 

My cinnamon buns come together in three steps, and I love this recipe because you knead the dough the night before, then the following morning, roll and fill it with the cinnamon stuffing, bake, frost and devour. 

Doing the first bit the night before separates the work and makes the process far less overwhelming. Worth the wait, always.

Ingredients - Dough

- 250g full cream milk

- 50g caster sugar

- 2 large eggs

- 10g yeast

- 550g flour

- 1 tsp (5g) baking powder

- 10g salt

- 150g unsalted butter, cut into 2-3cm cubes

ADVERTISEMENT

Method

1. Remove the butter from the fridge and cut into cubes (so it’s somewhere between room and fridge temp when you add it to the dough).

2. In the bowl of a stand-mixer with the dough hook attached, whisk together milk, sugar, eggs and yeast.

3. Add the flour, baking powder and salt, and mix on medium speed until the dough becomes smooth and there are no clumps (around 5 minutes).

4. Add butter 2 pieces at a time, waiting for the dough to absorb the butter before adding the next two cubes.

5. Continue mixing on medium until all butter has been incorporated and there is no butter visible in the dough (around 8 minutes from adding the first two pieces).

6. Transfer dough into an oiled bowl and wrap with plastic, then place in the fridge for 10-24 hours (if you make this in the evening, the timing will be perfect for the next days morning or afternoon tea).

Ingredients - Cinnamon Filling

- 250g light brown sugar

- 45g all-purpose flour

- 10g ground cinnamon

- ½ tsp salt flakes

- 100g unsalted butter, melted and cooled

Method

7. In a bowl, stir or whisk together ingredients for the cinnamon filling until smooth. Make sure the melted butter has cooled (you can speed this up by putting it in the fridge. If it’s hot, the mixture will stick together and be more difficult to spread on your dough).

ADVERTISEMENT

8. Remove dough from fridge and (making sure not to let too much heat transfer from your hands to the dough) shape into a rectangle to roll out.

9. Dust your workbench and the top of the dough. Roll dough into a rectangle of around 30x50cm. If you, like me, can’t get it rectangular with the rolling pin, just use your hands to stretch it out at the end where it needs it. Be careful not to transfer too much heat into the dough with your fingers..

10. Leaving a 2cm margin at the top of the dough (to allow the cinnamon rolls to seal), sprinkle and spread the cinnamon filling mix evenly over the dough.

11. Working from the bottom of the dough (closest to you), roll up the dough gently but tightly.

12. Cut your length of dough in half, then cut each half into 6 x 5cm pieces (you’ll have 12 pieces total).

13. Place your cinnamon rolls in round cake tins (6 per 20cm tin) or onto a baking tray sprayed with oil and cover with plastic wrap.

14. Place in a warm place (the oven with the light on is my go to), and prove for 1-2 hours, until rolls have almost doubled in size.

15. During the last 30 minutes of the proof, preheat the oven to 180°C.

16. Bake for 20-25 minutes, until rolls are golden brown.

Ingredients - Cream Cheese Glaze

- 160g cream cheese

- 100g icing sugar

- 50g full cream milk

ADVERTISEMENT

- 1¼ tsp vanilla extract

- ⅛ (or slightly less - just the tiniest pinch!) citric acid, or a squeeze of lemon juice (1 tsp)

- Optional: toasted walnuts, to top

17. For the cream cheese glaze, place all ingredients in a jug and use a stick blender to blend until smooth. If you don’t have a stick blender, you can easily whisk everything together (but be sure to have room temperature cream cheese) - I just find the stick blender easier and quicker! This will make slightly more than you need for 12 buns but if you’re anything like me, you’ll both want to spoon extra on your buns / in your mouth.

18. Top buns with cream cheese glaze while they’re still warm. These are best eaten on the day of baking, but if you’d like to save some to reheat on another day, wrap and keep in the fridge unglazed, then microwave and glaze at the time of eating.

19. Optional: top with toasted walnuts.

Tori Falzon is a trained chef and nutritionist turned recipe developer and social media manager. Under her brand ‘Into The Sauce’, Tori shares her obsessively tried and tested recipes, providing inspiration for everything from weeknight meals to entertaining. Tori’s other skills include finding hacks and efficiency in life and the kitchen, fashion and style, and finding amazing products at the best price. You can follow her on Instagram  @intothesauce.

Feature Image: Instagram / @intothesauce.

We want to hear about your version of Family! Complete this survey to go in the running to win a $100 gift voucher.