food

The 5 best RecipeTin Eats dishes that adults love (and kids will eat too).

Whether you have kids or not, figuring out what to make for dinner can be a challenge.

You want something yummy and satisfying after a busy day, but it should also be easy to make when you're too tired to spend a lot of time in the kitchen. And of course, everyone in the house (including picky little eaters) should like it.

We asked the Mamamia team to share their favourite family weeknight dinners from RecipeTin Eats that are not only delicious and easy to cook but also a winner with the kids.

1. Italian Beef Rice Pilaf.

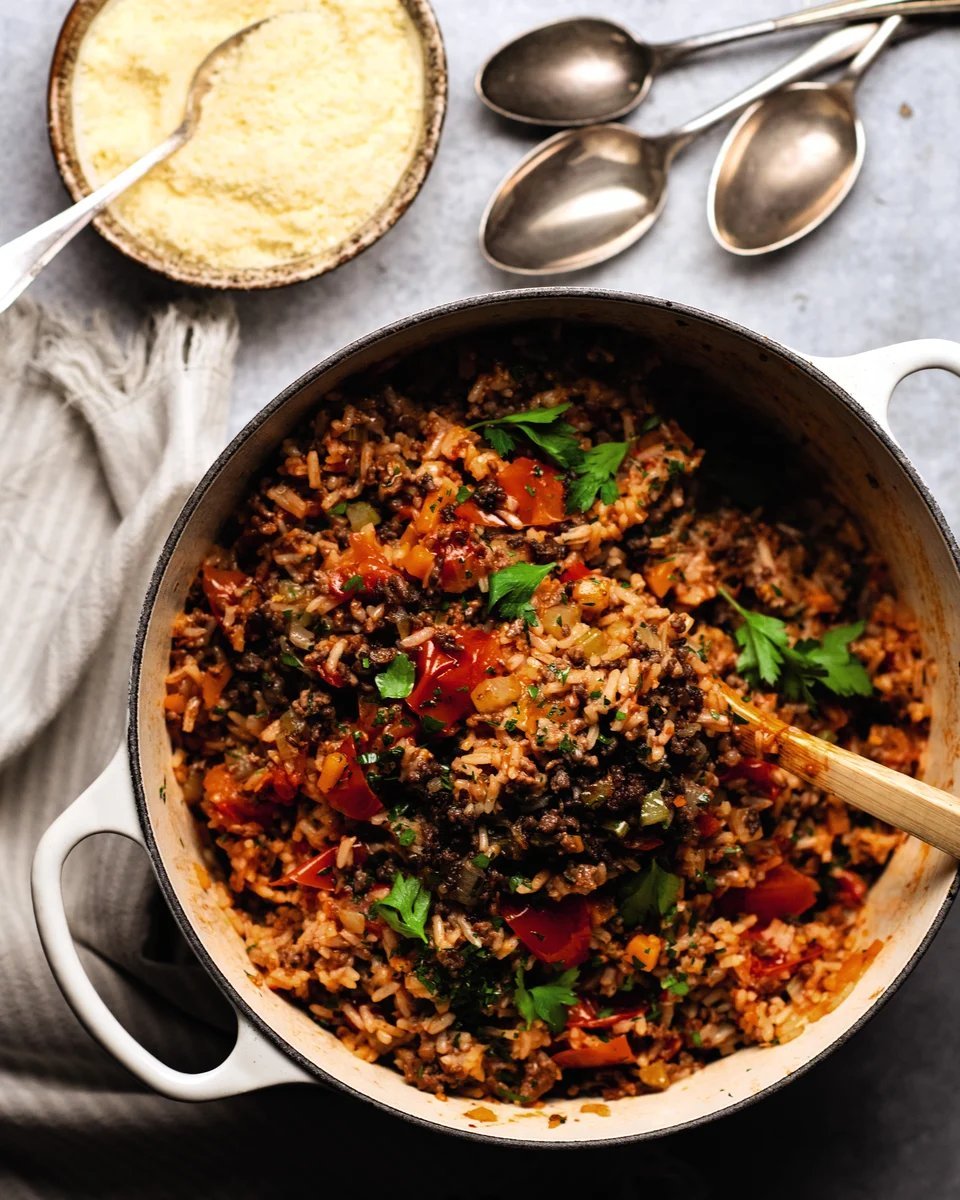
RecipeTin Eats' Italian Beef Rice Pilaf. Image: RecipeTin Eats.

ADVERTISEMENT

"So. Bloody. Good. It's so easy to make and is one of those dishes where you can make substitutions if you have picky eaters." — Isabella Ross, Senior News Writer.

Serves: 5.

Prep: 10 minutes.

Cook: 40 minutes.

Ingredients: 

  • 2 tbsp olive oil 
  • 2 garlic cloves, minced
  • 1 brown onion, finely chopped 
  • 1 large carrot, peeled, diced into 5mm cubes 
  • 1 celery stalk, diced into 5mm cubes 
  • 1 1/2 tsp fennel seeds (Note 1)
  • 1/2 tsp dried chilli flakes 
  • 500g beef mince (Note 2)
  • 1 1/4 tsp cooking salt
  • 1 1/2 cups (300g) long-grain white rice (Note 3)
  • 400g can of crushed tomato 
  • 2 1/2 cups (625ml) low-salt beef stock
  • 1 bay leaf (optional)
  • 2 tsp Worcestershire sauce 
  • 2 tomatoes, cut into 8 wedges, then halved

To Serve:

  • 1/4 cup (5g) roughly chopped parsley (optional) 
  • Parmesan, finely grated (not optional!)

Instructions:

1. Heat the oil in a large pot over high heat. Add the garlic, onion, carrot, celery, fennel seeds and chilli flakes. Cook for 5 minutes until the onion is translucent.

2. Add the beef and 1/2 teaspoon salt. Cook, breaking it up as you go, until it changes from pink to brown.

3. Add the rice and stir to coat. Add the remaining ingredients, stir, then once it comes to a simmer, cover with a lid (do not stir again) and turn the heat down to low. Cook for 22 minutes or until the rice is tender (there should still be a layer of liquid). Remove from the stove and rest, covered, for 5 minutes — the rice will soften further.

4. Remove the lid. Add the chopped parsley (if using) and gently stir, then serve, sprinkled with as much parmesan as you desire!

Notes:

1. This is the secret ingredient that adds a special touch to this otherwise simple dish. Don't be tempted to skip it!

ADVERTISEMENT

2. Pork or lamb mince would also work well in this recipe.

3. Medium-grain rice, jasmine and basmati rice can be substituted. Please don't use brown rice, sushi or other short-grain rice, wild rice (or any other 'gourmet' rices for that matter), quinoa or cauliflower rice! You can't use risotto rice either, because it's not actually a risotto!

Leftovers: Refrigerate for three days. Not suitable for freezing.

2. Jambalaya.

RecipeTin Eats' Jambalaya. Image: RecipeTin Eats. 

ADVERTISEMENT

"An iconic dish from New Orleans. It's got lots of yummy stuff like chicken, prawns and tomato, rice and vegies! I didn't think prawn and chicken could work together so well, but I was wrong." — Tys Autagavaia, Influencer Client Executive.

Serves: 5. 

Prep: 20 minutes.

Cook: 50 minutes.

Ingredients:

  • 1 tbsp vegetable oil
  • 180g bacon, preferably smoked, chopped
  • 200g andouille or smoked sausage, sliced 0.5cm thick (Note 1)
  • 300g chicken thigh, skinless, boneless, cut into 2.5cm pieces
  • 12 large prawns, raw (peeled, with or without tails)
  • 1 tbsp (15g) butter
  • 4 garlic cloves, minced
  • 1 large onion, cut into 1.5cm pieces
  • 2 celery ribs, cut into 1.5cm pieces
  • 2 medium green capsicums, cut into 1.5cm pieces
  • 1.25 cups long grain rice, uncooked (Note 2)
  • 2.5 cups (625ml) low-sodium chicken broth/stock (Note 3)
  • 2 tbsp tomato paste
  • 200g crushed canned tomato
  • 2 tsp chopped fresh thyme (or 1 tsp dried thyme)
  • 1 cup green onions, sliced, plus more for serving

Creole seasoning mix: 

  • 4 tsp sweet paprika
  • 1 tsp garlic powder
  • 1 tsp onion powder
  • 1/2 tsp cayenne powder (adjust spice to taste)
  • 1/2 tsp black pepper
  • 1/2 tsp salt

Instructions:

1. Preheat oven to 180°C (all types).

2. Heat oil in a very large skillet or Dutch oven over medium-high heat.

3. Add bacon, cook for 30 seconds (to start fat melting), then add sausages. Cook until sausages are golden — about 3 minutes — then remove into a bowl.

4. Add chicken into the pan and cook until golden (doesn't need to cook inside), then add to bowl with bacon.

5. Sear prawns in the pan for 1.5 minutes on each side, then transfer to a separate bowl (reserve until later).

6. Add butter, then garlic, onion, celery and capsicum. Cook for 3 to 4 minutes or until slightly softened.

7. Add rice and stir to coat grains in oil.

8. Add chicken broth, tomato paste, canned tomato, thyme and seasoning mix.

9. Stir well, then add chicken, sausages and bacon (including all liquid).

ADVERTISEMENT

10. When you see bubbles across most of the surface, stir well once more. Ensure all rice is submerged, cover with lid, and transfer to oven. 

11. Bake for 20 minutes. Remove the lid and check rice by eating a few grains (careful, very hot!) If the rice is just about done, go to the next step. If rice grains are still firm in the centre, continue to cook, checking rice every 5 minutes — most ovens take about 30 mins total to cook (see Note 4).

12. Add prawns and green onions, QUICKLY (but gently!) stir through, cover with lid, and return to oven for 3 minutes (just to heat prawns).

13. Remove from oven, stir gently to fluff, then serve, garnished with more green onions if desired.

Notes:

1. Andouille Sausages — Smoky spicy Louisiana sausages impart a smoky flavour into the dish. Hard to find outside the US — I have not found them anywhere in Sydney, Australia. Best substitute for Andouille: smoked Polish sausages from Polish or European delis (ask for the smokiest!), Kransky or even chorizo plus SMOKED bacon (instead of normal) and SMOKED paprika (instead of sweet).

2. Rice — long grain is best here for the rice texture in the finished dish. 

3. Chicken broth — Low-sodium chicken broth is used here. If using full salt chicken stock, reduce salt in spice mix to 1/4 tsp. You can also use homemade chicken stock!

4. Oven cooking time — The total cooking time can vary quite a lot, depending on what sort of pot you use (cast iron vs regular thinner-walled pot) and your oven (fan-forced vs slower, older ovens). Cooking times can be as long as 45 minutes, but in my oven and most others, it's done in 25-30 mins. This is why I recommend you start checking at 20 mins, and then every 5 mins after that.

ADVERTISEMENT

3. Canned Tuna Pasta.

RecipeTin Eats Canned Tuna Pasta. Image: RecipeTin Eats.

"This is my go-to, 'I've-got-nothing-to-cook-so-I'm-resorting-to-pantry-staples-because-it's-the-end-of-the-pay-cycle' meal. Easy, cheap, delicious and can be made for those who want to cook for lots of little mouths." — Courtney Ammenhauser, Commercial Executive Producer. 

Serves: 2.

Prep: 10 minutes.

ADVERTISEMENT

Cook: 15 minutes.

Ingredients: 

  • 200g spaghetti, or other thin long pasta
  • 1 tbsp cooking salt, for cooking pasta

Tuna pasta sauce:

  • 285g (approx) canned tuna in oil, drained, oil reserved (Nagi uses 3x95g cans, Note 1)
  • 2 clove garlic, finely minced
  • 2 anchovy fillets, minced (Note 2)
  • 1/2 tsp chilli flakes/red pepper flakes (can skip, Note 3)
  • 2 tsp baby capers (or finely chopped pickles)
  • 1 tbsp parsley, finely chopped (okay to skip)
  • 1 tsp lemon zest
  • 2 tbsp lemon juice (sub 1 tbsp apple cider or sherry vinegar)
  • 1/4 tsp cooking/kosher salt
  • 1/4 tsp black pepper

Instructions

1. Cook pasta: Bring 3 litres of water to the boil with 1 tablespoon of salt. Cook pasta per the packet time, minus 1 minute. Just before draining, scoop out approximately 1 cup of pasta cooking water, then drain the pasta.

2. Sauté aromatics: In the same pot, heat the reserved oil from the tuna can/s over medium heat. Add the garlic, anchovies and chilli flakes. Cook and stir for 1 minute.

3. Toss pasta: Add the pasta, capers and 1/3 cup of reserved pasta water. Toss using 2 spatulas for 2 minutes.

4. Add tuna: Turn off the heat. Add tuna, parsley, lemon zest, juice, salt and pepper. Toss gently to mix through – try to  keep some tuna chunks. 

5. Serve immediately.

Notes:

1. Tuna — Don't get too hung up on tuna quantity here, the recipe can take a little more or a little less. I use 3 x 95g/3.5 oz cans, the small "lunch size" cans. You just want enough tuna to serve 2 people.

If you only have tuna in brine, use 2 tablespoons of extra virgin olive oil instead.

2. Anchovies add great flavour here. Substitute with 1 tsp anchovy paste. If you don't have either, it's still worth making if you're using tuna in oil as the oil has good flavour too!

3. Chilli flakes add just a background hum of warmth to this recipe. Feel free to dial it up or down.

ADVERTISEMENT

4. Leftovers will keep for 2 days in the fridge, though pasta never really reheats well, especially these types of pasta that don't come with loads of tomato or creamy sauce. Microwave reheating is best, with a splash of water (or better yet, keep some pasta cooking water!)

4. Falafel.

RecipeTin Eats' Falafel. Image: RecipeTin Eats.

"I made these falafels the other night! They were SO GOOD. I made a big batch and froze half of the mixture for another day." — Pip Lamb, Sales Manager.

ADVERTISEMENT

Serves: 20 falafels (4-5 per plate).

Prep: 25 minutes.

Cook: 10 minutes.

Soaking: 12 hours.

Ingredients:

Falafel:

  • 225g dried chickpeas (Note 1)
  • 1 cup parsley leaves, roughly chopped
  • 1 cup coriander/cilantro leaves, roughly chopped
  • 6 scallions/shallots, white and light green parts only finely chopped (Note 2)
  • 2 cloves of garlic, minced
  • 1 tsp cumin
  • 1/2 tsp coriander
  • 1 1/2 tsp salt
  • 1/2 tsp baking powder (Note 3)
  • 4 tsp flour (plain/all-purpose) OR chickpea flour
  • 5 tbsp water

For frying: 

  • 500 ml (2 cups)+ vegetable oil (Note 4)

Tahini sauce (other sauces, please see Note 5):

  • 4 tbsp tahini
  • 2 tbsp lemon juice
  • 4 tbsp water
  • 1/4 tsp salt (adjust to taste)

Serving (Note 6):

  • Pita bread or other flatbreads
  • Tabbouleh
  • Hummus (optional extra)
  • Shredded lettuce, tomato slices, sliced red or white onion

Instructions: 

Falafel

1. Place chickpeas in a large bowl and pour over plenty of cold water. Leave to soak for 12+ hours (even 2 days is fine).

2. Drain chickpeas well. Place in a food processor and add remaining falafel ingredients.

3. Blitz for 2 to 3 minutes on high, scraping down sides as necessary, until the chickpeas are very small grains. Mixture should look like smooth guacamole from the outside.

4. Scoop up heaped tablespoons and shape into balls (or dome, disc or torpedo), place on a tray. Should make around 20, about 2.5cm wide.

5. Refrigerate for 30 minutes.

6. Pour oil in a skillet or large pot — at least 1.7cm (2/3") depth (Note 4). Heat on medium-high to 180-190°C / 355F (or drop a bit in, should sizzle energetically).

7. Place a ball in a large spoon (or tongs) and slide ball in. Cook in batches for around 4 minutes, using 2 forks to roll, until deep golden and super crusty on the outside.

ADVERTISEMENT

8. Drain on paper towels. Repeat with remaining falafel.

9. Serve fresh out of the fryer with sauce of choice! Make falafel wraps or plates with tabbouleh, tomato, onion, and sauces of choice. See Notes 5 and 6.

Tahini sauce:

  • Combine tahini and lemon juice, and mix well. The mixture will stiffen.
  • Stir in the water 1 tbsp at a time and it will loosen again. The final consistency should be like a thick drizzle sauce. Season to taste with salt.

Recipe Notes:

1. Dried chickpeas cannot be substituted with canned! Won't work. Weight equates to just shy of 1 1/4 cups.

2. Shallots (green onions/scallions) — use only the white and light green part (oniony flavour), not the dark green part. You need about 3/4 cup — don't need to be exact here.

3. Baking powder — not all recipes use this. We did a side-by-side taste test of a batch with and without. Hands down, baking powder is better — fluffier and more moist inside, without baking powder it's more dense and a bit dough-like. Trade secret we picked up from a great falafel store in Sydney (Hijazi’s Falafel in Earlwood).

4. Oil quantity — You don't need to fully deep fry. You can just use 2 cups/500ml oil, just turn them a few times. Also, if you shape the falafel in disc form (as some shops do) then you can use even less, maybe even 1 cup/250ml oil.

5. Sauce — Some form of sauce is a must with falafel. Traditionally served with Tahini Sauce, but other options include plain yoghurt, yoghurt lemon sauce (yoghurt + lemon + garlic + salt + olive oil), a thin hummus (thin it using water), chilli/hot sauce. The sauce should be thin enough so it adds wetness when you eat it — eg. you don't want a thick hummus.

ADVERTISEMENT

6. How to Serve:

  • Falafel wraps/rolls — Use large or small flatbreads. Smear a good dollop of hummus or yoghurt (or yoghurt lemon sauce) down the middle. Top with tabbouleh and/or lettuce, tomato, onion and falafels broken in half. Drizzle with tahini sauce or other sauce of choice (I love adding hot sauce). Either roll or fold and devour!
  • Falafel plates — with tabbouleh and/or shredded iceberg lettuce with tomato slices, onion (red or white), tahini sauce with optional hummus with pita bread on the side. I love hot sauce too! A spiced pilaf like Mejadra (Middle Eastern lentil rice) is a terrific addition as well (and GF option).

7. Reheating: Falafel is one of those foods that's truly best served fresh out of the fryer. But the best way to store/reheat cooked falafel is in an airtight container in the fridge for up to 5 days (really!). Microwave to reheat (really!) THEN spray with plenty of oil and bake at 200C/390F for 5 minutes just until the surface is crispy again.

8. Make ahead: Balls can be rolled and then kept uncooked in the fridge for 24 hours OR frozen. If frozen, fry from frozen — just add another 1 or 2 minutes to the frying time.

5. Baked Mac and Cheese

RecipeTin Eats' Baked Mac and Cheese. Image: RecipeTin Eats.

ADVERTISEMENT

"My housemate made this for my family when they visited us and none of my siblings have shut up about it since. The type of dish that will leave you licking your plate clean." — Shannen Findlay, Content Producer.

Serves: 6-8 people.

Prep: 10 minutes.

Cook: 1 hour.

Ingredients:

Macaroni

  • 250g macaroni (elbow pasta)
  • 1 tbsp (15g) unsalted butter (or 2 tsp oil)

Topping: 

  • 2/3 cup panko breadcrumbs (Note 1)
  • 2 tbsp (30g) unsalted butter, melted
  • 1/4 tsp salt

Sauce:

  • 4 tbsp (60g) unsalted butter
  • 1/3 cup flour, plain/all-purpose
  • 3 cups milk, warmed (low or full fat)
  • 2 cups freshly shredded cheese, gruyere best (followed by cheddar and Colby) (Note 2)
  • 1 cup freshly shredded mozzarella cheese, or more of other cheese of choice (Note 2)
  • 3/4 tsp salt

Seasonings (optional):

  • 1 tsp garlic powder
  • 1/2 tsp onion powder
  • 1/2 tsp mustard powder

Instructions: 

Pasta: 

1. Bring a large pot of water to a boil. Add macaroni and cook per packet directions MINUS 1 minute.

2. Drain, return pasta to pot, add butter and toss until melted. Set aside to cool while making the sauce (optional — Note 3).

Toppings: 

1. Mix together Topping ingredients. Set aside.

Sauce: 

1. Preheat oven to 180°C/350°F (all oven types).

2. Make roux: In a large saucepan or an oven-proof skillet (I use my 26cm/9" Lodge cast-iron skillet), melt butter over medium heat. Add flour and cook, stirring constantly, for 1 minute.

ADVERTISEMENT

3. Add about 1 cup of the milk and mix to dissolve the paste into the milk. Then add the remaining milk and mix until lump-free (use whisk if required).

4. Mix in salt and Seasonings ingredients if using.

5. Cook, stirring/whisking regularly, for 5-8 minutes until thickened to a cream consistency. When the sauce coats the back of a wooden spoon, you should be able to draw a path with your finger.

6. Remove from stove, add cheese and stir — cheese doesn't need to melt.

7. Adjust salt to taste (if you use recommended cheeses, you won't need more).

Assembling: 

1. Pour sauce into a pot with macaroni. Stir quickly, then pour back into the skillet (I did this) or a baking dish (Note 4). Sprinkle with breadcrumb topping.

2. Bake for 25 minutes or until top is light golden. Don't bake too long otherwise you'll bake away the sauce!

3. Serve immediately! I sprinkled mine with a bit of fresh parsley. See notes for best make-ahead method.

Recipe notes: 

1. Panko breadcrumbs are larger pieces than normal breadcrumbs, which creates a really nice extra crunchy topping. They can be found in the Asian section of supermarkets here in Australia. Can sub with normal breadcrumbs.

ADVERTISEMENT

2. Cheese:

  • Main cheese (2 cups) — my favourite is Gruyere for flavour and melting quality. Can use any flavoured melting cheese. Other cheeses I like for this include cheddar, Monterey Jack, Colby and provolone. (Australia/NZ: Tasty cheese works and is super tasty but the sauce is not quite as smooth.
  • I like to use mozzarella for the second cheese (1 cup). It melts really well into the sauce, has that nice stretch, and isn’t as oily as other cheese can be. Also, it’s less salty. However, you can just use more of the main cheese.
  • Always grate your own cheese for cheese sauces. Store-bought shredded cheese has anti-caking agents, which don’t melt so can give the sauce a slightly powdery texture.
  • The saltiness of cheeses varies so if you use another cheese other than gruyere for the main cheese that is much less salty (eg. Jarlsberg), you may need to add a pinch or two of extra salt into the sauce. Taste and check! Most cheeses are of similar salt levels though.

3. Tossing pasta with butter provides a light coating that helps prevent it from bloating while baking in the sauce. This is also the reason I let the pasta cool before mixing in with the sauce. Optional step — can skip it.

4. Baking dish size — 2.5L/2.5qt (10 cup) baking dish. A 23 x 33cm/9 x 13″ dish is perfect for a double batch, but a little too big for a single batch (spreads too thinly, you want more depth).

5. Prepare ahead: Mac and Cheese is best made fresh but if you need to make ahead, this is the best way: Cook pasta and toss in butter, cool (this is important as hot pasta will absorb sauce and bloat). Make cheese sauce per recipe, mix through pasta, and sprinkle on breadcrumb topping. Refrigerate or freeze (thaw fully in the fridge before baking). Cover with foil and bake for 15 minutes at 180°C/350°F. Remove foil then bake further 25 minutes until top is golden. (Fridge-cold Mac and Cheese takes longer to bake).

6. Reheating leftovers: The best way is to microwave to make it warm then spray top with oil (or butter) and crisp under grill/broiler.

7. 6 servings as a generous side — you will be surprised how far 250g/8oz stretches with a load of cheese sauce! Will serve 4 generously as a main.

What are your favourite RecipeTin Eats meals that the whole family enjoys? Let us know in the comments below!

Feature Image: RecipeTin Eats.

Calling all skincare lovers! Complete this survey now to go in the running to win a $50 gift voucher!