Got some makeup qualms?
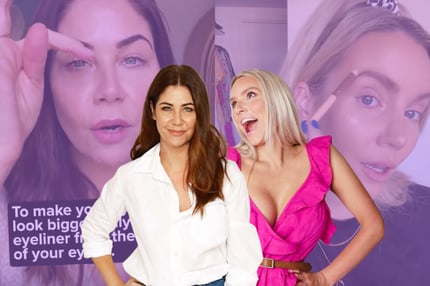
Enter: Leigh Campbell and Kelly McCarren. The co-hosts of the You Beauty podcast, they have decades of combined experience in the beauty industry - they've interviewed tons of experts and tried about eleventy million products between them.
So, if there's anyone who knows how to elevate your makeup game, it's them. They're literally BURSTING with juicy, industry secrets.
In our exclusive You Beauty Bites video series for Mamamia subscribers, we've pulled together their top how-to hacks for your best makeup yet.
And while there are obviously no rules when it comes to beauty, if you're looking for a bit of guidance on how to update your look in 2023, we've got everything you need right here.
1. Always use short strokes for the perfect eyeliner wing.
Okay, before we get into this one, we just want to make it clear that there’s no "correct" way - there are ten thousand ways to apply liner.
Everyone's eye shapes and sizes are different, so different techniques work for different people.
But if you've always struggled with eyeliner and want some pointers, Kelly and Leigh have you covered.
They each have their own personal ways of nailing a sharp-winged liner.
To start, Leigh grabs Raaw Cosmetics Eyeliner in Nutty Beige, $22.99, saying "I always use this on my waterline to reduce redness. It just brightens my eye area and makes me look like I got more than four hours of sleep last night."
For the upper lash line, she turns to Flavedo and Albedo Eyeliner in Black, $27, saying "It's a beautiful, creamy, blendable pencil. I apply it from the pupil outwards and do a tiny flick."
"The reason I don't do the whole lash line is that I want my eyes to look a little bigger and wider apart - so it kind of gives that optical illusion. Putting too much on the inner corners makes your eyes look closer together."
"I also use my finger and slightly pull the skin taut, using light, feathery strokes."
Leigh then uses one of her angled brushes to soften and blend the eyeliner.
"You can define the look further by going over the top with liquid liner. My favourite liquid eyeliner is a pen - it's so much easier to use."
FYI: Her pen of choice is Physicians Formula Liquid Liner, $21.55.
Using the exact same process (light, feathery strokes - not one big line), Leigh makes her eyeliner a little more defined and dramatic. "It also makes your lashes look lusher because it looks like the root is darker."
To finish? Use a Q-Tip with micellar water to fix up any mistakes.
Easy as pie.
2. For a quick lip look, apply straight from the bullet.
Want to know how to quickly and efficiently apply lipstick when you should've been out the door and on the bus 10 minutes ago?
Course you do. We all do.
"A lot of the reason I avoid lipstick in the first place is that it's too high maintenance," shares Leigh, who is all of us.
But there are some ways to get it on quickly and make it look good.
First? Apply straight from the lipstick bullet.
It may seem obvious, but sometimes applying straight from the bullet can be a little frightening and we instead use our fingers or a small brush.
"The bullet is designed to fit and mould onto your lips properly," said Kelly. "And especially if it's not a super bold colour - it doesn't matter too much about the finish.
"You could add a lip liner if you wanted - but I always just apply straight from the bullet if it's a pinky nude-y shade."
The only drawback? It probably won't last as long.
"If you're looking for something that you can apply quickly and easily but will still last all day, I'm going to show you how," said Kelly.
"I want you to start with liquid lipstick because liquid lipstick usually lasts longer. I would still apply it straight with your little doe foot applicator. To get really precise edges you can either use a lip liner in a similar shade or coat an angled brush with the lipstick to define the edges," she explains.
Using the iconic red MAC Ruby Woo, $34, Leigh said, "Back in the day if I was going somewhere fancy then I would use lip liner and a lip brush to really get that precise outline, but I feel like the lip look at the moment is a bit more worn."
Thank goodness for that.
Similar to Kelly, Leigh also recommends applying straight from the bullet, using a lip balm as a base for moisture (there's nothing worse than applying lipstick on dry lips).
To fix up any mistakes and even out the lip line, Leigh simply uses micellar water and a Q-Tip. (Bonus: It works great with eyeliner too!)
She adds, "Always take the lipstick with you so you can reapply it throughout the day as needed."
3. Don't apply blush to the apples of your cheeks.
Fact: A good cream blush has the ability to make you look 10 times more alive - but if you're anything like us, you tend to avoid it because it's... confusing and scary.
That's because, unlike powder blush, you don't have as much control over it, explains Kelly.
She shares, "Instead of lightly applying a bit of powder, you have to go straight in and trust the process - and if you're not that comfortable with it, you can be scared that you're going to end up looking like a clown."
Feels.
She goes on to say, "Cream blush is one of my absolute favourite products to use. I think it's one of the best ways - if not, the best way - to make you look really healthy and youthful and dewy. Even if you're feeling tired AF. It's such a good way to bring your face and complexion back to life."
Her cream blush of choice? Anastasia Beverly Hills Stick Blush ‘Peachy Keen’, $51. She adds, "soft baby pinks and peachy colours are universally flattering."
Leigh uses Byredo Colour Stick in Flower Play, $51, sharing that when it comes to technique, you should generally avoid applying the blush directly to the apples of your cheek.
Wait...what?
Instead, "You should apply the blush further up and outwards from the apples."
"The trick with cream blush is to not drag," said Leigh. "You want to tap. Then, use a moist beauty blender or your fingers to blend it in."
Voila! Look at that healthy, fresh face.
4. Bronzer placement iseverything.
When it comes to applying bronzer and highlighter, it's all about placement - a tiny tweak makes a massive difference.
"I often use this Mecca Max Bronzer ($25) because it's affordable and so great," shares Leigh. She also uses a "really great fluffy bronzer brush," from Zoeva.
After tapping off the excess powder, she said: "You wanna apply the bronzer in the dark points of your face - if you make a fishy face, you want your bronzer to go there. Under the cheekbones, and where the 'sun would naturally hit'."
"So, on your forehead, a little bit on the bridge of your nose, your chin and then under your chin a little bit - just for a bit of contouring. It's very subtle - just a bit of definition."
"I don't do a lot of contouring, I must say, just because I don't have a lot of time," she adds.
Rather than a powdered bronzer, Kelly opts for a cream bronzer (she uses Anastasia Beverly Hills Cream Bronzer, $56). However for oily skin, she does recommend powdered options.
"Bronzing and highlighting are all about contouring," she shares. "And creating the shade and light on your face, so you look a bit more three-dimensional. because obviously when you put a base on - everything is the same shade. So, we're going to accentuate it a bit more."
Starting at her jawline, Kelly uses a brush to line the cream bronzer. Next, she moves to her cheekbones.
"When applying bronzer to your cheekbones, go from the top of your ear to the corner of your mouth," she adds. "But don't go too far down because [we] don't want to get jowl-y."
She finishes off by using the bronzer on her nose, drawing a line down either side to add definition.
Next, she blends it in using a contouring brush, buffing it all out. "Make sure that you're not moving the product. However, if it's a good cream product, it shouldn't move anything else underneath."
Once she's blended, she then sets her cream bronzer with a powder bronzer, picking up a larger, more fluffy brush to buff it. "Because I don't want those really harsh 2016 Kim Kardashian sharp lines."
Note taken.
5. Highlighter can be used to make your eyes look bigger.
When it comes to highlighter, you're also going to want to make sure you have the placement- because, similarly to bronzer, it can make a world of difference.
Generally, Leigh and Kelly said you should add it to where the light naturally hits your features - that is, the bits you want to draw attention to.
Leigh uses a sample-sized Mecca Max highlighter, explaining, "I generally use a powder bronzer and a liquid highlighter. I pop it on my finger because I only want the tiniest bit and then apply it to my high points, dabbing it in with my finger."
She also applies it down the bridge of her nose and cupid's bow - pretty much anywhere you want to... well, highlight.
Another sneaky tip? You can also apply highlighter on the inner corner of your eye to make your eyes look larger and more awake.
6. 'Skin finishing' is the secret to glowing, celebrity skin.
Ever heard of 'skin finishing'? It's basically what celebs do on their shins, shoulders and decolletage to fake looking dewy and healthy all over.
"Skin finishing is how the celebrities hit the red carpet looking glowy from head to toe - it's not just about their faces but their bodies are done too," said Leigh. (Just to note - this is a separate category from fake tanning.)
The first tip is to use a temporary tanning gel or oil like Bondi Sands Glo Shimmer One Day Tan, $19.95. This is one Leigh says she uses*all*the time - so you know it's gotta be good.
"It's the semi-matte one and isn't super sparkly. I use this if I haven't done a fake tan and if I haven't had the time and the outfit requires some kind of glow," she said.
"Once it dries, it dries. Even if it rains, it's not going to wash off on you. However, it's quite tinted. So I often mix it with body moisturiser just to dilute it a little bit."
Smart.
"If I'm going somewhere really special, I'll use a specific skin-finishing product [like] Ciate's Dewy Stix Body, $41. Basically, it's a big gloss - but for your body."
"I apply it to the parts that I want to look really shimmery. You can apply it all over if you want... I
Erin Docherty
Beauty & Lifestyle Editor
No Comments
Be the first to leave a comment