New mums: we know you can never have too many clean bibs. And while you could buy bibs in bulk, we’ve found an even better option. Get crafty. Real crafty.
Here are the step-by-step instructions:
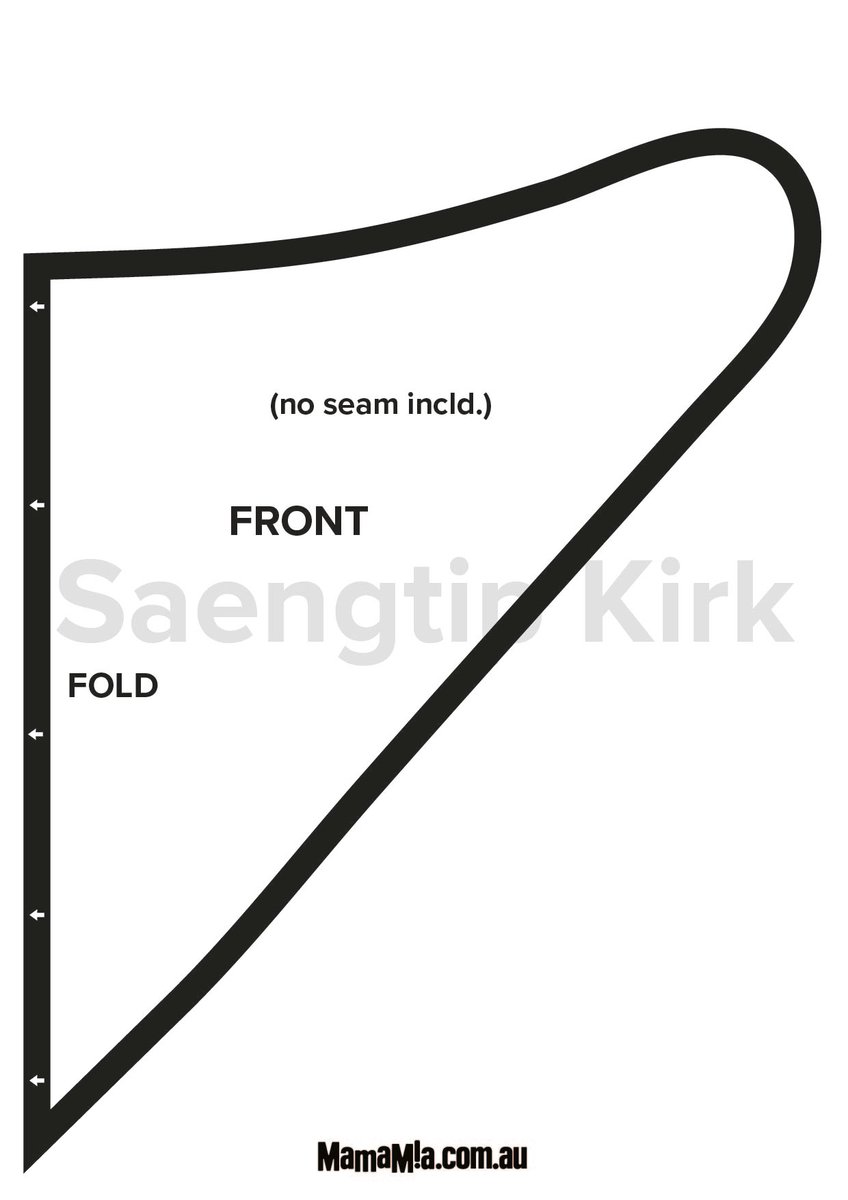
1 . Draw a pattern that resembles a curved shark fin (bib pattern 1) on a piece of cardboard and cut it out.
2. Fold an old shirt in half longways so the sides of the shirt come together.
3. Place the pattern on the folded shirt and cut out the front part of the bib (which is slightly bigger than the back-towel part - the excess material goes up to baby's chin and catches the dribble). Note: By placing the pattern on the fold, it ensures the bib is symmetrical.
4. Cut using pinking shears (zig-zag scissors) so the material does not fray.
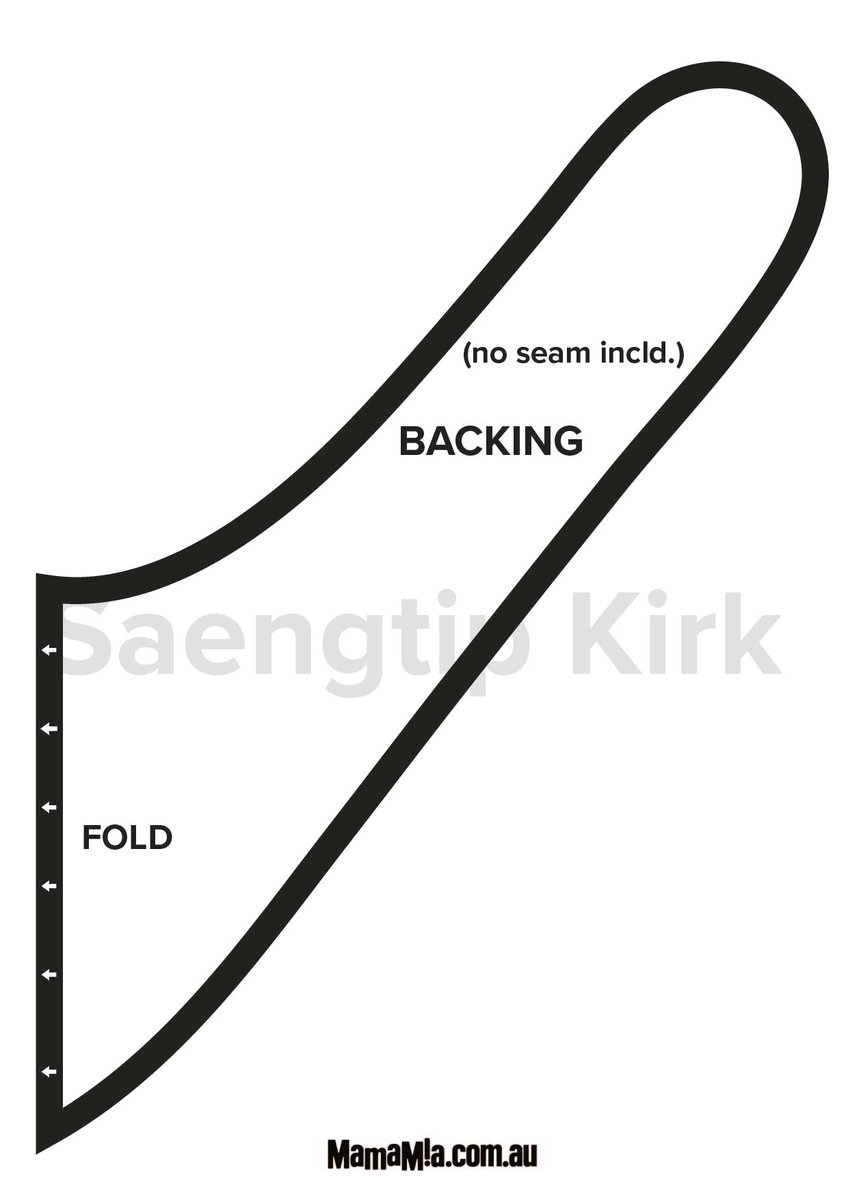
5. Fold an old towel in half.
6. Place the pattern (bib pattern 2) on the folded towel and cut the back part of the bib (which is slightly smaller than the front). Note: Cut using pinking shears (zig zag scissors) so the material does not fray.
7. Place the back part (towel cut out) on the table.
8. Place the front-part (shirt cut out) with the inside-side of the shirt facing up to you and the outside-side of the shirt facing down on to the towel part.
What It Means To Give Birth On Country
The Delivery Room