beauty

How to touch up your roots at home: A helpful, expert-approved guide.


Looking for some distractions during these uncertain times? Come join our You Beauty Facebook group for light, helpful chat about things to put on your face. And body. And hair. You can also sign up to get our weekly You Beauty newsletter in your inbox. It’s full of handy tips and product reviews from Senior Lifestyle Writer and You Beauty podcast host Amy Clark

You might be wondering… why would anyone bother touching up their roots or covering grey hairs at a time when we’re all in isolation and no one will even see them?

Great question, and the answer is: you don’t have to, now or ever.

Regardless of whether you’re staying home or still going to work at the moment, what we do and don’t do to our faces, hair, bodies etc. is, as always, our own choice. Doing eff all to your regrowth and greys is 100 per cent OK, as is preferring to have your roots touched up for any number of reasons.

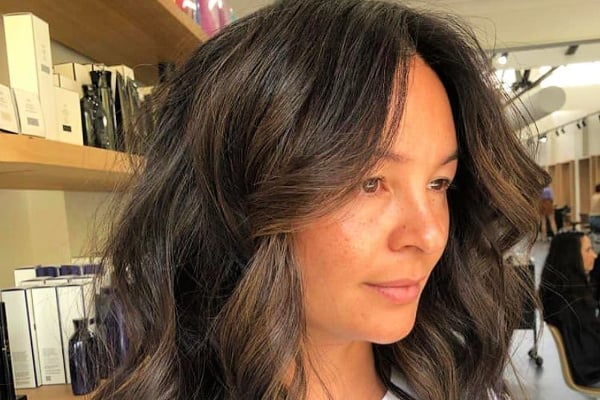
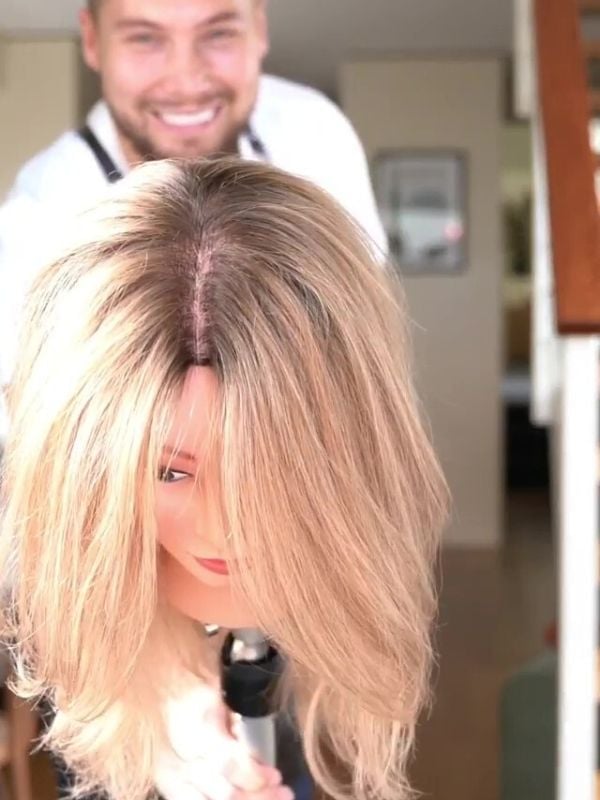
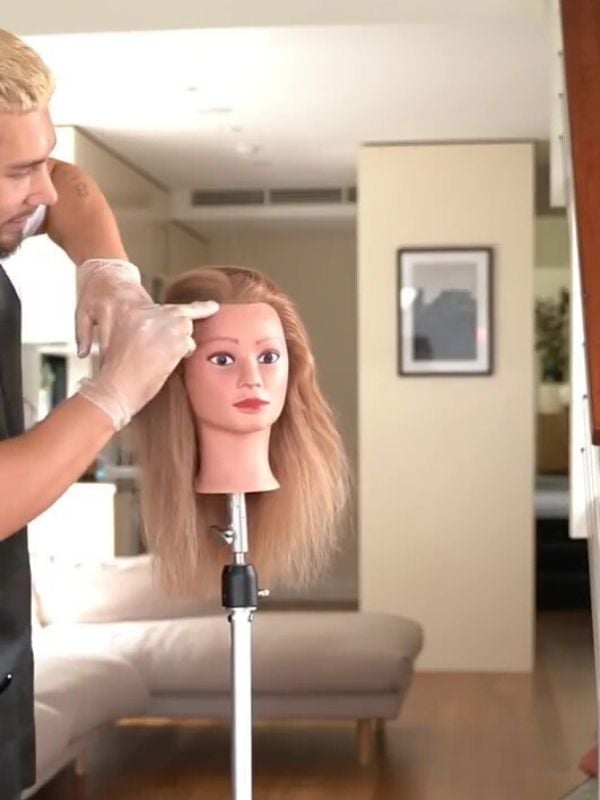
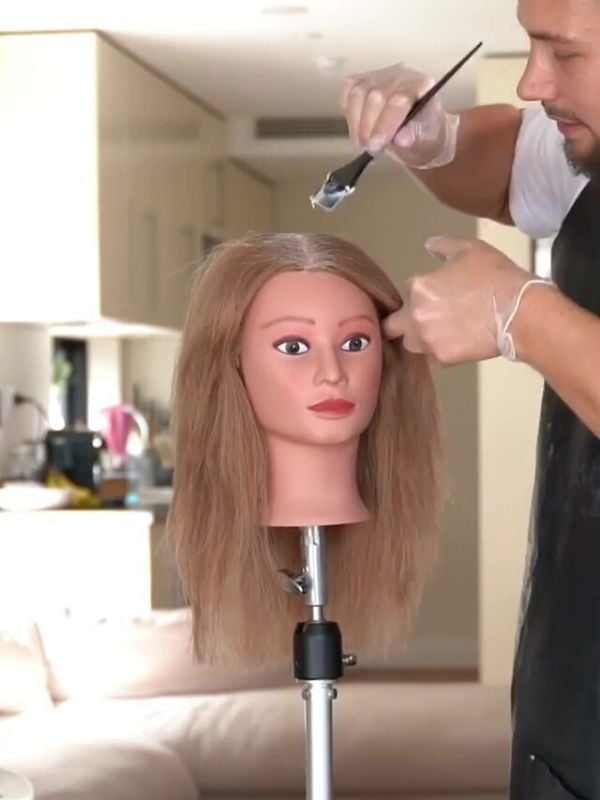
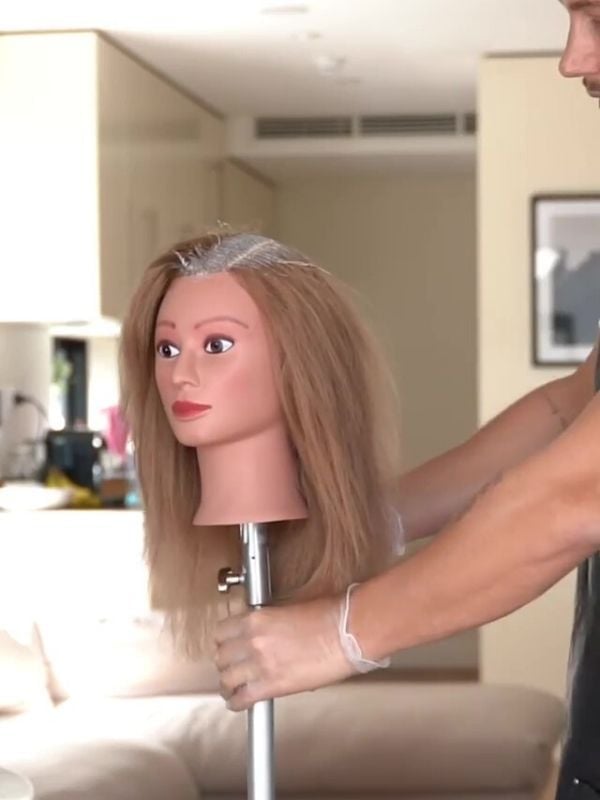
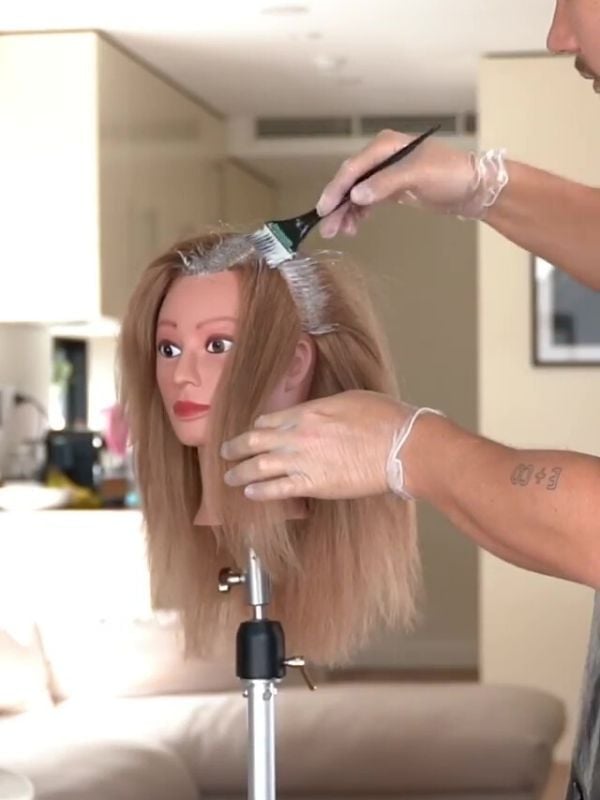
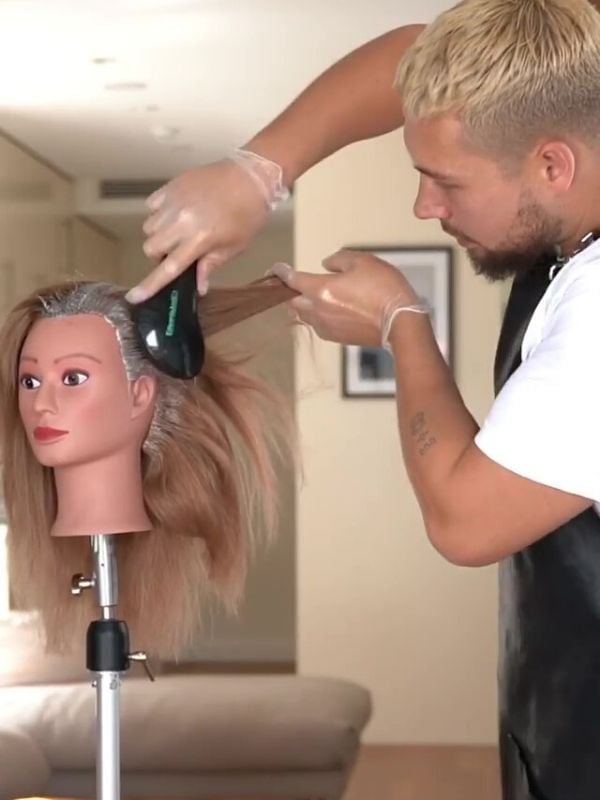
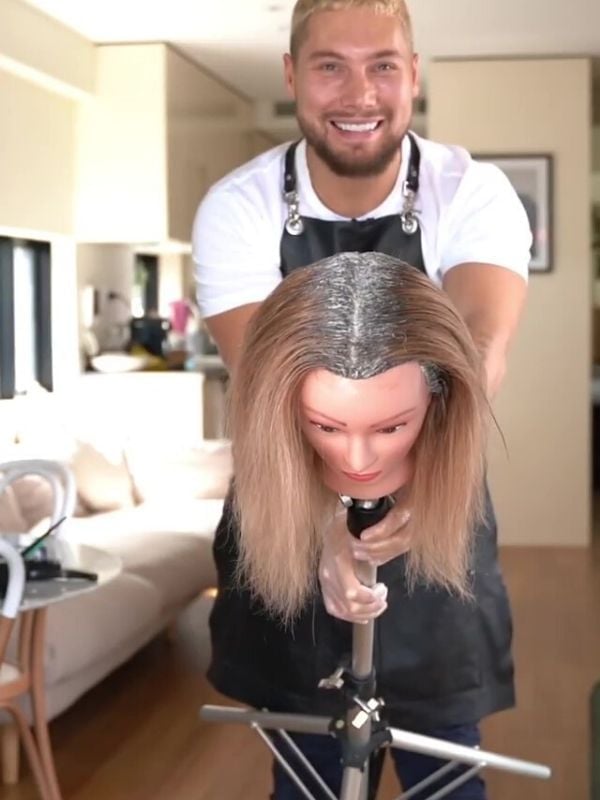
If that’s you, keep scrolling for a helpful explainer on how to touch up your roots at home under the guidance of celebrity hairstylist and Edwards and Co Founder, Jaye Edwards.


View this post on Instagram


THE LOCKDOWN WITH EDWARDS AND CO ???? ⠀ ⠀ Episode 1: Colouring At Home With @jaye_edwards ⠀ ⠀⠀ We understand it’s a difficult time right now and we are adapting as much as possible to what’s going on. While our salons are still open, we wanted to create this resource for those who don’t feel comfortable coming in. We are in the business of transformation and want to keep you feeling good while staying safe at the same time.⠀ ⠀⠀ In this episode, Jaye demonstrates how to apply your own colour at home. ⠀ ⠀⠀ We have launched our own EdwardsAndCo at home colour kits. These kits will have everything you need including brushes, bowls and gloves, along with some detailed instructions. Kits can be purchased online with free shipping.⠀ ⠀ Please get in touch!

A post shared by Edwards And Co. (@_edwardsandco) on

ADVERTISEMENT

But first, why would a hairstylist recommend dyeing your hair at home?

Ordinarily, they wouldn’t. COVID-19 is a really sh*t time for everyone, particularly for those who have lost their jobs or have had to shut down their businesses. Beauty service-based businesses, including hair salons, have been hit hard and a lot of hairdressers are now out of work for the foreseeable future.

Tackling at-home hair dyeing pretty much goes against everything many stylists and colourists believe in, but as Jaye told Mamamia, now is the time for businesses in the beauty industry who are financially able to adapt.

“We’ve got to be flexible and think outside the box to ensure staff and clients feel supported and safe, even if that means encouraging our clients to colour their own hair at home for now.”

ADVERTISEMENT

A bunch of salons and sole traders like Edwards and Co are doing this by delivering custom at-home colour kits to clients based off their colour history, and creating educational content to give people the basic knowledge to do tasks like removing SNS or shellac manicures, or shaping eyebrows at home if they feel like it.

Now, onto your step-by-step guide to touching up your roots yourself.

WATCH: Here’s Jaye Edwards’ full tutorial on how to dye your roots at home. Would highly recommend watching the whole way through! Post continues after video.

Video via EdwardsAndCo

How to dye roots at home.

As you can see in the video tutorial above, here’s the quick rundown on how to dye your roots at home:

  1. Prep the skin around your hairline with a barrier cream.
  2. Carefully and thoroughly mix your colour kit (as per the instructions for the specific product you’re using).
  3. Part your hair as you normally would and paint the dye onto the hair, ensuring an even saturation of product.
  4. Section half a centimetre of hair to one side of your part line and flip it over. Paint both sides of your regrowth. Continue sectioning, flipping and painting until you’ve covered the regrowth you can see.
  5. To cover greys or regrowth on the sides around your ears, section your hair from behind the ear, flip it forward and paint either side of the regrowth. Continue sectioning half-centimetre sections, flipping them back towards the ear and painting until you’ve covered the regrowth you can see.
  6. To cover greys or regrowth on the sides of your neck and under your ear, hold your hair up and paint the outside layer around the side of the neck for coverage when wearing your hair up.
  7. Flip your hair back to your original part line and gently brush through with a detangling brush to blend the colour.
  8. Repeat steps four to seven on the other side of your head.
  9. Leave the colour to process for roughly 30 minutes (or the recommended length of time for the specific product you’re using).
  10. Rinse hair and dry.

Yep. It’s a lot.

how to dye roots at home
The end result looks something like this! Supplied/EdwardsAndCo.
ADVERTISEMENT

How to touch up your roots: Let's break it down.

I asked Jaye to share a bit more information on exactly how each step works so you can be confident dyeing your roots at home (or getting whoever who is stuck at home with you to do it for you).

What you need to dye your roots at home:

  • A colour kit - this could be a box dye colour, professional products purchased from stores like Hairhouse Warehouse or Price Attack, or a custom kit made up by your hairdresser.
  • Gloves.
  • A towel.
  • Barrier cream - Vaseline, Paw Paw Ointment or lube will do the trick too.
  • A bowl, mixer and brush (if not provided in your colour kit).
  • A brush - preferably a detangler, but you can use any brush with plastic bristles.
  • A comb.

Learn about at-home hair colouring in this episode of the You Beauty podcast below, post continues after audio.

Step 1: Prep.

This step is to protect your skin from being stained by the hair dye. You can use a barrier cream product, Vaseline, Paw Paw Ointment, and even Jaye's suggestion, lube.

"A lot of people won't have barrier cream at home, but little old lube does the same job. Oil-based lube works best, but water-based works too, you'll just need to apply it a bit thicker."

Pull your hair back and rub your chosen barrier cream all the way around your hairline, including on the neck and around your ears. And don't worry about getting it on your hair - it won't stop the hair from being coloured.

ADVERTISEMENT
how to dye roots at home
Meet Jaye's lovely hair model Priscilla! She's having some lube rubbed into her hairline in this photo. Image: Supplied/EdwardsAndCo.

Step 2: Mix your hair dye.

This step will look a bit different depending on which dye product you choose, but always wear gloves to protect your hands. At-home dyes generally come in two parts you can mix together in some kind of bowl or plastic tray provided. Professional kits like the Edwards and Co ones include a bowl, mixer and brush.

ADVERTISEMENT

Jaye's advice is to spend time mixing your colour thoroughly so you get a great consistency that's easier to apply.

Step 3: Let's start applying the dye.

The following instructions only apply to dyeing your roots to cover regrowth or greys, or doing a root shadow (a technique you would've seen all over Instagram that uses a darker shade on the roots). We're not doing highlights or balayage or a full head of blonde foils here. Jaye adds, "You only need to do what you can see. Keep it simple."

First, part your hair as you normally would. Then, dip your painting brush into the dye and paint the colour onto the roots.

"If you're covering greys, it's important not to overlap onto your coloured hair. If you're doing a root shadow, you need to paint past where your regrowth line is,"  Jaye says.

"I would really advise, if you've got someone at home with you, to get them to help you do this. If you're doing this yourself, make sure you're in front of the mirror. I wouldn't worry too much about the back of your hair... you can follow your part line and paint down to around your crown (the bit where your hair spirals out from) so when your hair is down, it's all covered."

how to dye roots at home
Part your hair and start painting your roots. Supplied/EdwardsAndCo.
ADVERTISEMENT

Step 4: More painting.

"Next, use the pointy end of the brush or a comb to section a half-centimetre section of hair on one side of your part. Flip it over, then apply dye to the underside of those roots. Paint both sides, this will make sure if you are covering greys, you get a good, even saturation of dye," Jaye says.

Continue sectioning, flipping and painting until you've covered the regrowth you can see - generally, you don't want to go further than an inch-and-a-half from your part line.

You can watch Jaye do this in his video tutorial above. Trust me, it'll make perfect sense once you do.

how to dye roots at home
Here's what this step should look like when you're done. Supplied/EdwardsAndCo.
ADVERTISEMENT

Step 5: Covering hair around the sides of the ear.

This is specific to those wanting to cover greys, as you might notice you have a lot of them on the sides around your ear.

Run your comb behind the ear and section that hair forward so you can paint the hair back from the face around the ears. Continue sectioning half-centimetre sections, flipping them back towards the ear and painting until you reach your sideburn hairline.

how to dye roots at home
A lot of us find we get greys around the ear. Supplied/EdwardsAndCo.
ADVERTISEMENT

Step 6: Don't forget your neck.

To cover any greys or regrowth along the hairline on the side of your neck, all you need to do is pull the hair up and away from your face, and paint the outside layer along the hairline so you're covered when wearing your hair up.

how to dye roots at home
Here's how to do your hairline along your neck. Supplied/EdwardsAndCo.
ADVERTISEMENT

Steps 7 and 8: Blend, then repeat.

That's one side done! Flip your hair back to your original part line and gently brush through with a detangling brush for a blended colour. Jaye says the idea isn't to brush the colour out or through your hair, but to blend it so the result looks natural and seamless.

Repeat steps four to seven on the other side. The whole lot should take between 20 to 45 minutes depending on your hair texture and thickness.

how to dye roots at home
Gently brush the colour through. Supplied/EdwardsAndCo.
ADVERTISEMENT
how to dye roots at home
Once you've done both sides, it should look nice and neat like this. Supplied/EdwardsAndCo.
ADVERTISEMENT

Step 9: Waiting for your colour to process.

Most colours will process in 30 minutes, but always follow the instructions for the product you've chosen. Jaye's advice for killing time while you wait is to apply a treatment to the ends of your hair.

His favourite is the Redken pH-Bonder Post Service Protector ($39.95) but you can also try Olaplex Hair Perfector No.3 Home Treatment ($49.95) or any hair oil/mask you like. Apply the product through the mid-lengths and ends of your hair for a more hydrated, shiny, frizz-free finish. This step is especially great for blondes or those who regularly colour their hair.

Step 10: Rinse hair and dry.

Once time is up, rinse your hair in the shower until the water runs clear. Roughly towel dry your hair and apply a leave-in conditioner - Jaye's favourite is the VIRTUE Refresh Purifying Leave-in Conditioner ($49) but you can use any product you like.

Blow-dry your hair, and you're done!

And that is how to touch up your roots at home, should you want to. Godspeed!

Feature image: EdwardsAndCo.

Have you tried at-home hair dye before? Tell us about your experience in the comments below.