beauty

DIY ornaments for kids: 10 cool ideas your crew can do

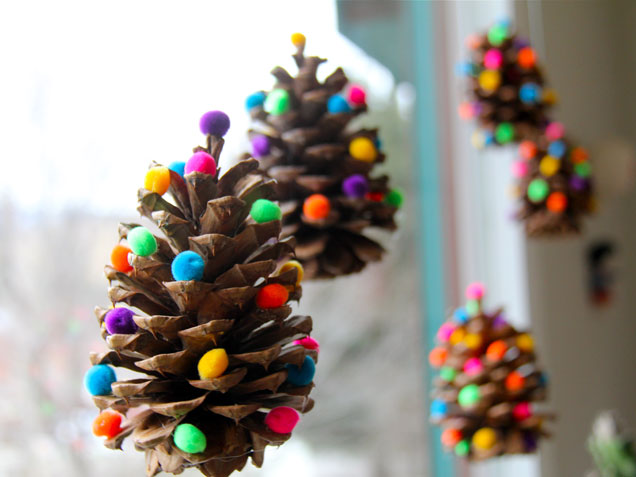
Your child’s Saturday-afternoon craft project can turn into a sweet gift for Grandma, thanks to these adorable DIY ornaments for kids.

Pick one of these ideas and a lucky recipient, but help your kiddos make extras, because you’ll want one of these for your own tree, too!

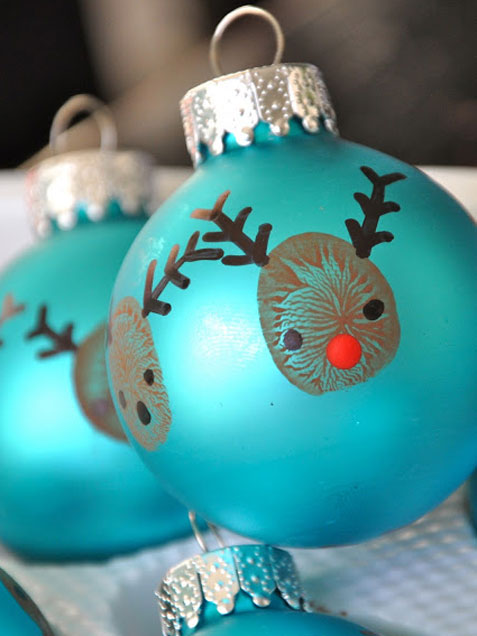
Reindeer Thumbprints

What You’ll Need:
- solid colour ball ornaments (matte finish works best)
- brown and red craft paint
- black Sharpie marker
- paint brush or chopstick

How to Do It: Lightly paint your child's thumb with brown paint then press onto ornament in four to six places. Let dry, then add eyes and antlers with the black marker. Use the end of a paintbrush or chopstick to make the nose. Add your child’s initials and date with the black marker on the bottom.

Why We Love It: It's an easy DIY ornament for kids with a personal touch - and those cute thumbs won't be this little ever again!

From: Little Bit Funky


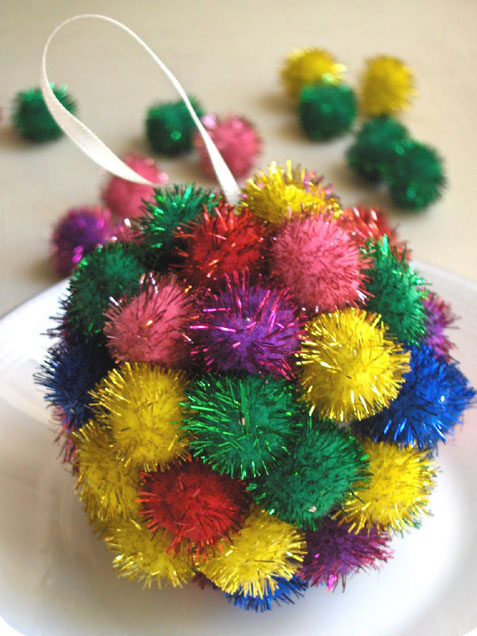
Pom Pom Sparkle Ball

What You’ll Need:
- Styrofoam ball
- scissors
- ribbon
- straight pins
- small twinkle pom-poms
- hot glue gun (optional)

How to Do It: Make a loop with your ribbon, tie it at the bottom, then pin onto the top of your ball to make a hanger. Then help your child place a pin through the centre of a pom-pom and secure it to the ball. Continue pinning on pom-poms until the ball is covered. Secure any loose pom-poms with hot glue, if necessary.

Why We Love It: These festive sparkly ornaments let kids get creative with colour and patterns. Just be careful with the pins - and handle any necessary hot glue yourself!

ADVERTISEMENT

From: Zakka Life


Craft Stick Snowmen

What You'll Need
- thick craft sticks
- white craft paint
- paint brush
- fabric scraps
- orange and black construction paper
- beads or buttons
- scissors
- fine-point black marker
- ribbon
- hot glue gun

How to Do It: Paint the craft sticks white and let dry. Cut strips of fabric for scarves. Cut hats out of black paper and small triangles for the noses out of orange paper. Use hot glue to attach the nose, scarf, buttons, hat and ribbon for a hanger to each stick. Draw on eyes and noses with the black marker.

Why We Love It: Like real snowmen, each of these will be one-of-a-kind.

From: How to Have It All


Beaded Candy Canes

What You’ll Need:
- green chenille stems
- white and red pony beads
- scissors or wire cutters

How to Do It: If your chenille stems are long, cut them in half. Slide a bead onto a chenille stem and bend the end around the bead to keep it in place. Slide more beads onto the stem, alternating between red and white, until it’s full. Bend the end around the last bead and bend one end into a candy cane shape.

Why We Love It: It's a cute, easy, minimal-mess project - and these sweet ornaments can double as package toppers, too.

From: The Fountain Avenue Kitchen


Pom Pom Pine Cones

ADVERTISEMENT

What You'll Need
- pinecones
- small pom-poms
- hot glue gun
- monofilament

How to Do It: Add a dab of hot glue to a pot on the pinecone; then help your child carefully place a pom pom on top of the glue. Repeat as many times as you want for a colourful cone. Tie a loop of monofilament to the top for a hanger. (Secure with another dot of hot glue, if necessary.)

Why We Love It: Going on a pinecone hunt is as much fun as making the ornaments!

From: Dig This Chick


Pearly Flower Ornaments

What You’ll Need:
- Styrofoam balls
- pearlised straight pins
- red flower scrapbook embellishments
- red ribbon

How to Do It: Stick a pin through the centre of a flower, then secure to the Styrofoam ball. (For safety reasons, help her with this part!) Repeat until the ball is covered. To make a hanger, make a loop with ribbon and secure it to the ball with a ribbon.

Why We Love It: An elegant and easy project for older kids; Grandma would be proud to hang this beauty on her tree.

From: Meg Duerksen


Salt Dough Footprints

What You’ll Need:

- 2 cups white flour
- 1 cup table salt
- 1 cup lukewarm water
- circle cookie cutter that’s bigger than your child’s foot (a jar or can may work)
- metal letter/number punches or toothpick
- sandpaper
- red craft paint
- polyurethane or clear spray paint

ADVERTISEMENT

How to Do It: Preheat oven to 120ºC. Mix flour and salt in a bowl. Make a well in the centre, add half of the lukewarm water and mix with a knife. Add the rest of the water a spoonful at a time until the dough comes together enough to knead. (It shouldn’t be sticky.) Knead the dough for about 10 minutes, dusting with flour as needed, until soft. Roll dough flat until it’s 4mm thick. Cut circles from the dough. Push child’s foot into the dough, and imprint his name and the date with metal punches or a toothpick. Put ornaments on a cookie sheet and bake for about 2 hours, until they dry out but don’t start to change colour. (You can also let them air-dry for 48 hours.) When dry, smooth any rough edges with sandpaper. Paint with craft paint and let dry. Seal with polyurethane or clear spray paint.

Why We Love It: Salt dough ornaments are the ultimate holiday keepsake - and you'll treasure these sweet ornaments more each year as your children grow.

From: Things For Boys


Rudolph Ornament

What You’ll Need: 
- 2 wooden clothespins
- brown paint
- glue
- googley eyes
- red button
- ribbon or yarn
- black marker 

How to Do It: Glue clothespins together so the “head” of the pin is connected in the opposite direction as the “legs.” Glue on two googley eyes and a red button for Rudolph’s red nose. Then tie a piece of ribbon or yarn around the reindeer so that you can hang it on your tree. Easy!

Why we love it: It's an easy DIY ornament you can make with stuff you probably already have around your house - and c'mon, who doesn't love Rudolph?

From: Just For Fun 

ADVERTISEMENT


Scrappy Happy Ornament

What You’ll Need: 
- Styrofoam balls
- brightly coloured, small fabric scraps
- paintbrush
- glue
- ribbon
- bowl of soap and water
- rag

How to Do It: Use a paintbrush to cover the Styrofoam ball with glue, then stick on the fabric pieces, overlapping them as you go. Once the ball is completely covered, paint over the fabric with glue and let it dry. Glue a piece of ribbon around the ball and tie it in a knot at the top. Tie another knot about an inch higher to form a loop. Take a second piece of ribbon and wrap it around the ball - it should form an “X” on the bottom. Tie it in a knot and then a bow at the top of the ball, and it's ready to hang!

Why We Love It: It's pretty - and a perfectly creative way to use up scrap fabric or make a sweet memento from outgrown baby clothes.

From: The Red Thread 


Button Trees

What You'll Need:
- Buttons
- String
- Star bead

How to Do It: Thread both ends of a piece of string or cord through each button, stacking the buttons on top of each other and working your way up to the star. Just make sure you leave enough string to make a loop to hang it! (You can find more detailed instructionshere.)

Why We Love It: You only need two things to make this adorable tree - buttons and string. And threading the buttons on the string is great for helping little kids develop fine motor skills.

From: UK Lass in the US